Ford 390 FE Engine Overhaul
WATER PUMP & TIMING SET REMOVAL
BACK TO HOME PAGE
Whether you are shooting for an overhaul
or simply changing your timing chain, this procedure is the same.
The only 'fancy' tool you will need is a puller for the damper pulley.
I made my own for under a couple bucks. The rest is rather easy;
use the crankshaft bolt to draw the damper pulley back up when you're
done. Let's get started...
 #1
#1
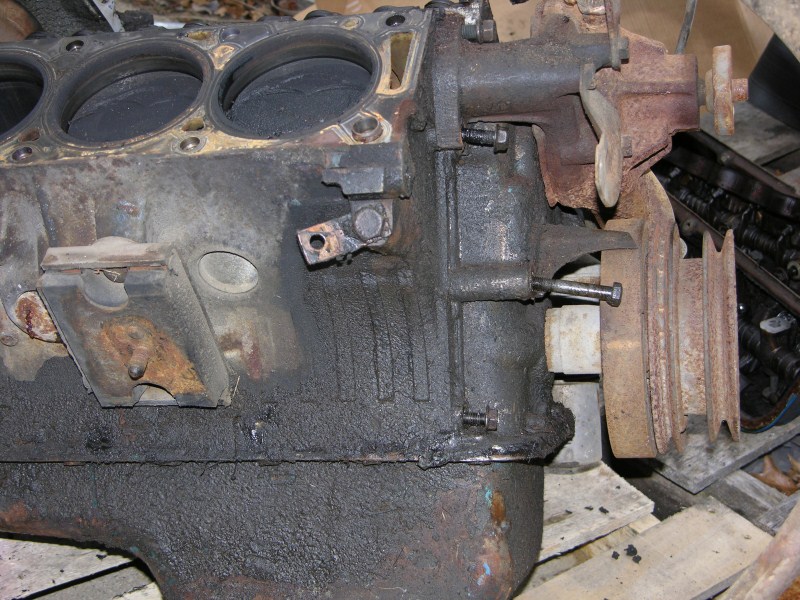
Remove belts, brackets and everything hanging from them.
We call this the engine's, FINAL DRESS. Next, remove (4) bolts
that hold the water pump on, with a 9/16" wrench. Remove the
fuel pump and filter assembly.
Since I'm here, I also loosened some of the Timing Cover bolts.
Most of them need a 1/2" wrench except for the very bottom-front
three bolts.
They use a 9/16".
The oil pan lip in front is bolted from the bottom with four bolts.
 #2
#2
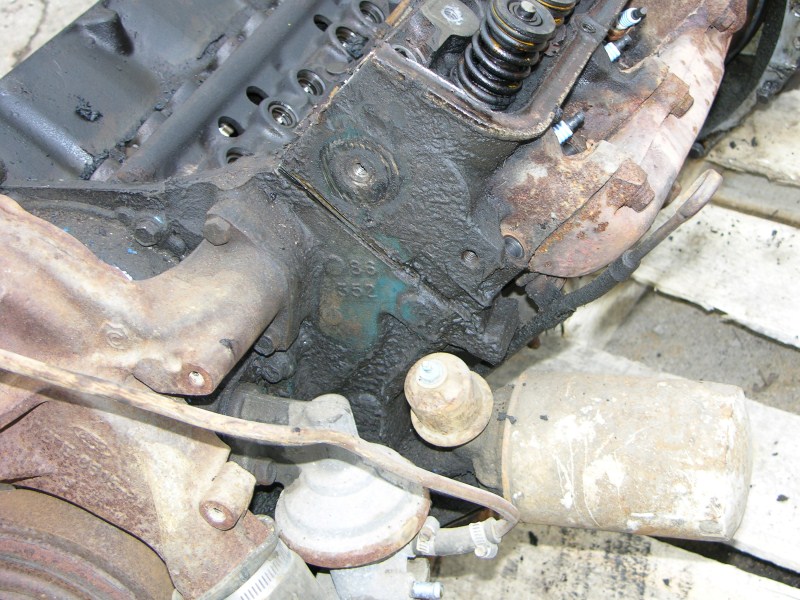
There are the
three bolts, just under the bottom Water Pump bolt.
If you have a good array of tools, you can get around the oil
filter. If not, take the oil filter bolts off, then the fuel
pump bolts are a straight shot.
 #3
#3
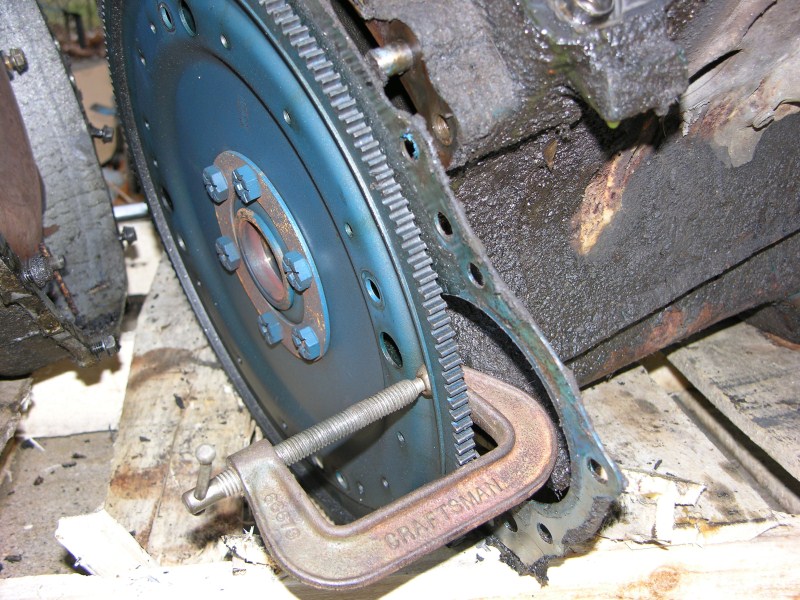
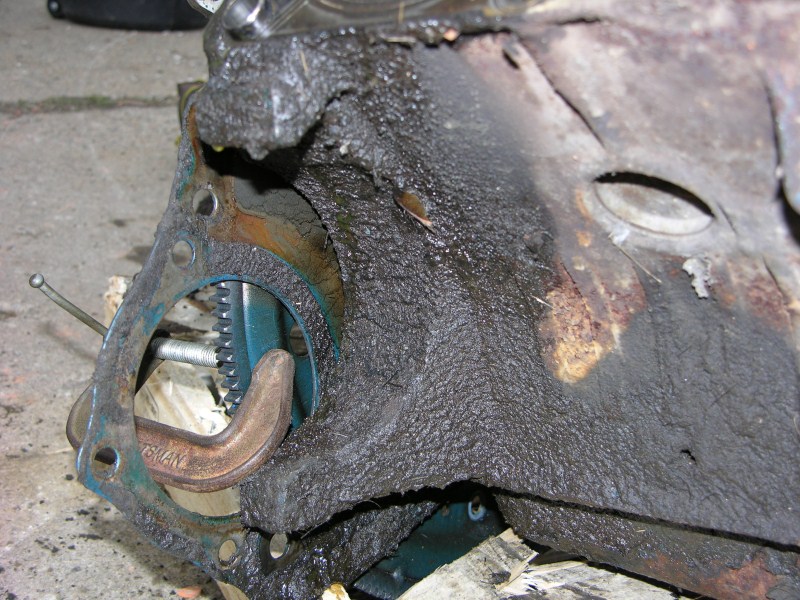
This is the bolt everybody dreads, but it really isn't bad IF you use proper tools. There are no surprises or left-hand
threads. The trick is to stop the crank from turning. If the engine is in the car,
just put it in gear and hold the brake on. On the automatics, I pull the inspection plate off and use a screwdriver in the flex plate teeth.
Here with the engine out of the car, I'm using a "C" clamp
on the flex plate. For the Damper Pulley bolt, I use a 1/2"-drive, 1" hex socket. I don't keep a lot of unnecessary tools, so my torque wrench doubles as a long breaker bar.
 #4
#4
There's my secret.
 #5
#5
 #6
#6
The 'C' clamp rests on the block and
easily holds the crank solid.
 #7
#7
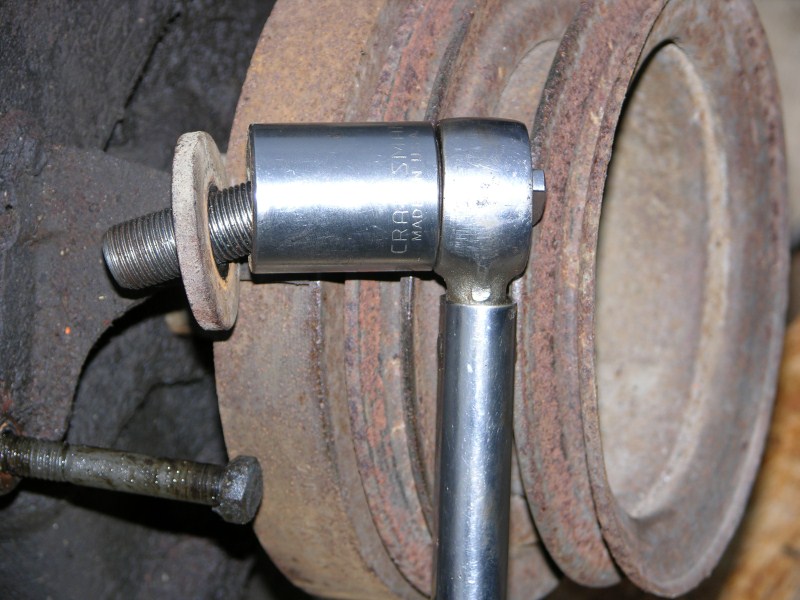
With a little muscle
and serious leverage, this bolt came right off. It's a regular
national fine thread.
 #8
#8
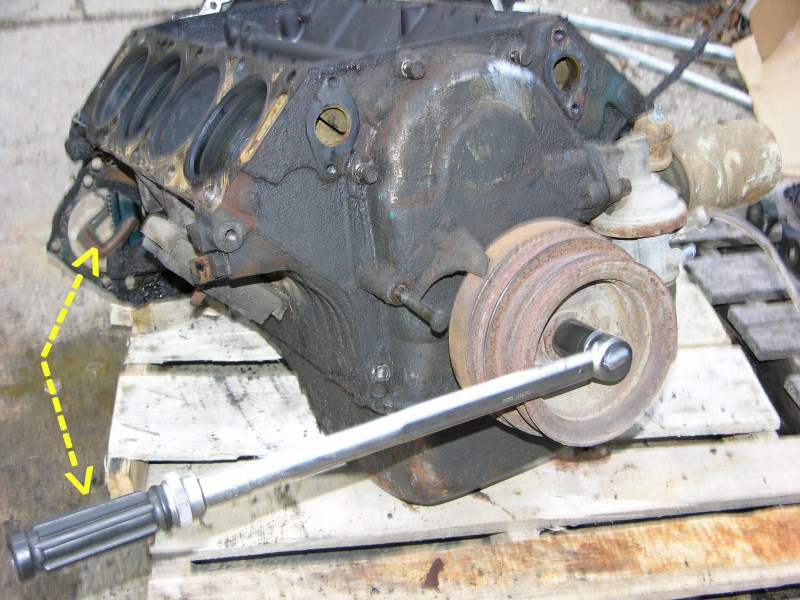
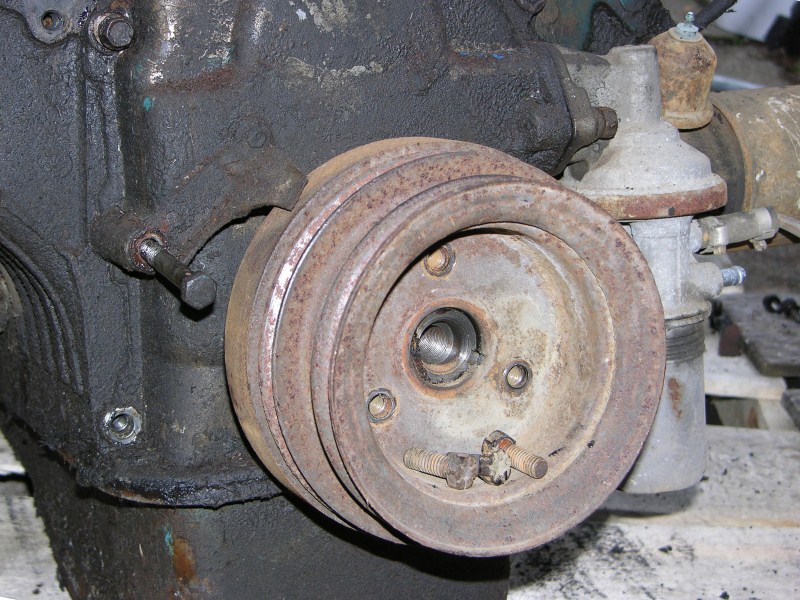
Now we need a
puller, but where do we attach it?
 #9
#9
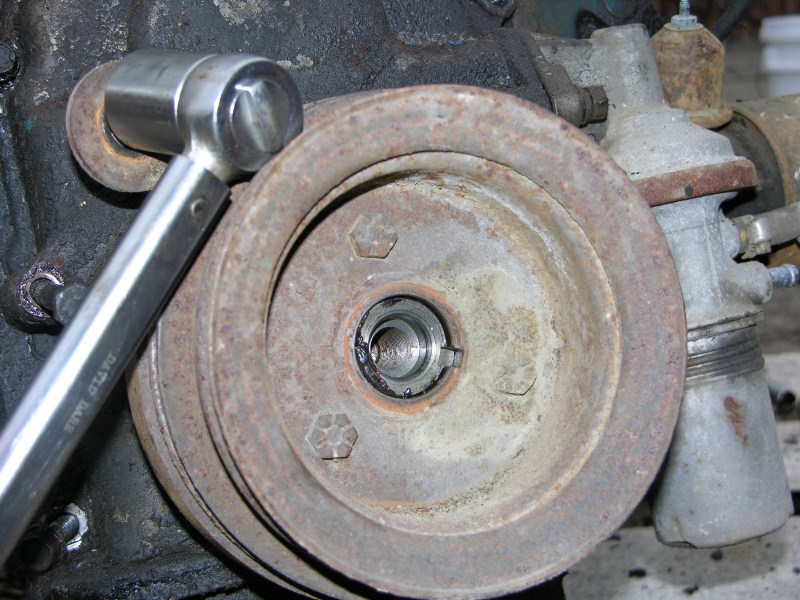
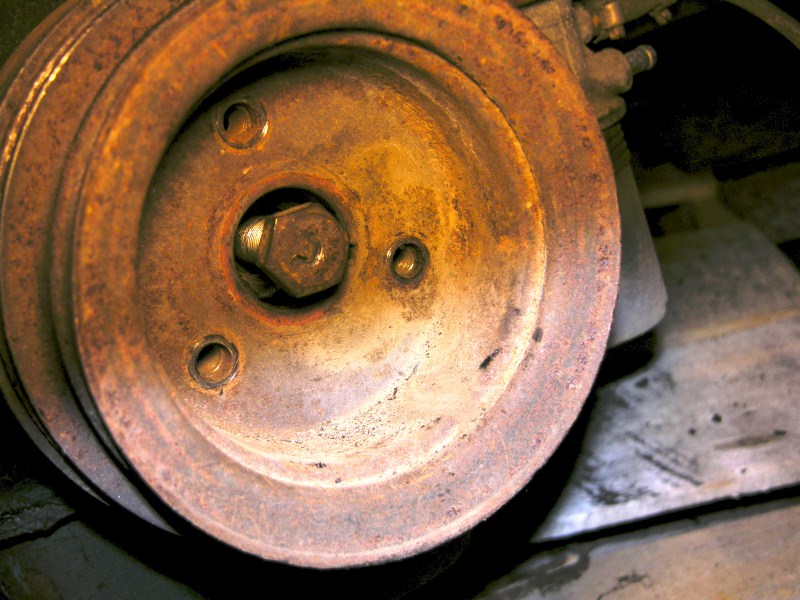
Remove the three
pulley screws with a 9/16" socket, and use these holes for your
puller. There is no need to separate the damper pulley from
the sheave, but you can (I didn't).
 #10
#10
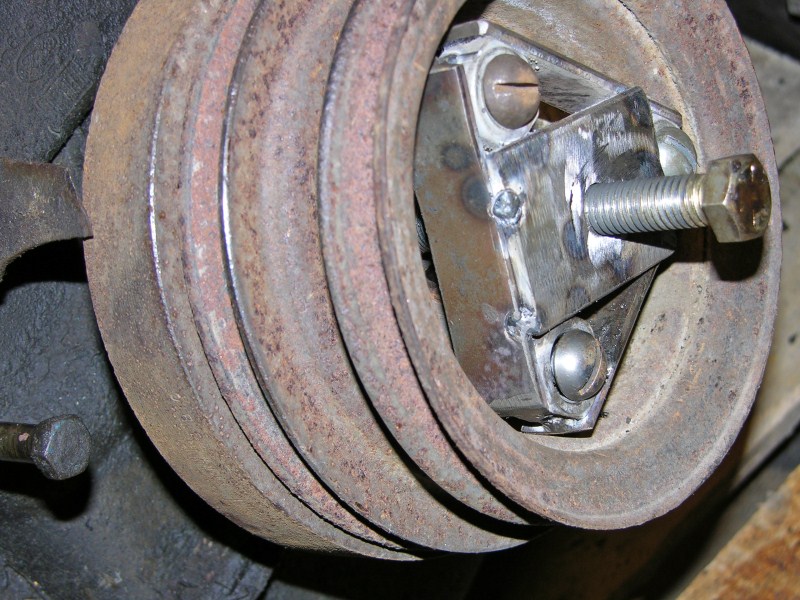
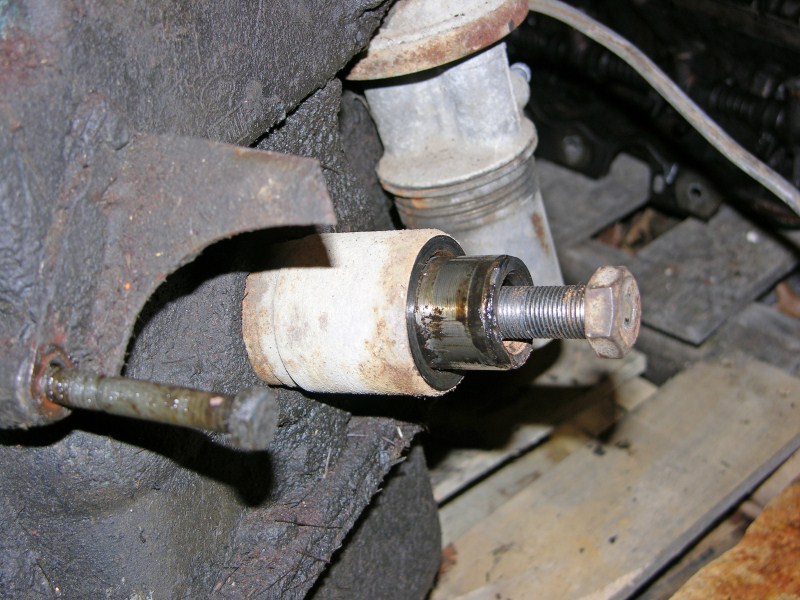
Remove the big washer from the Crank bolt and screw it back in, about
six turns.
I didn't have a puller, so I quickly fabricated the one you see
(from: four nuts, three strips of steel,
and a center bolt). It took me ten minutes.
There is a 1/2" nut tack welded
beneath the center 'jack screw'. The
puller's
jack screw then pushes the Crank bolt in, while the three
slot-head screws pull the pulley out. The three slotted screws
are very soft 'junk' I had laying around.
 #11
#11
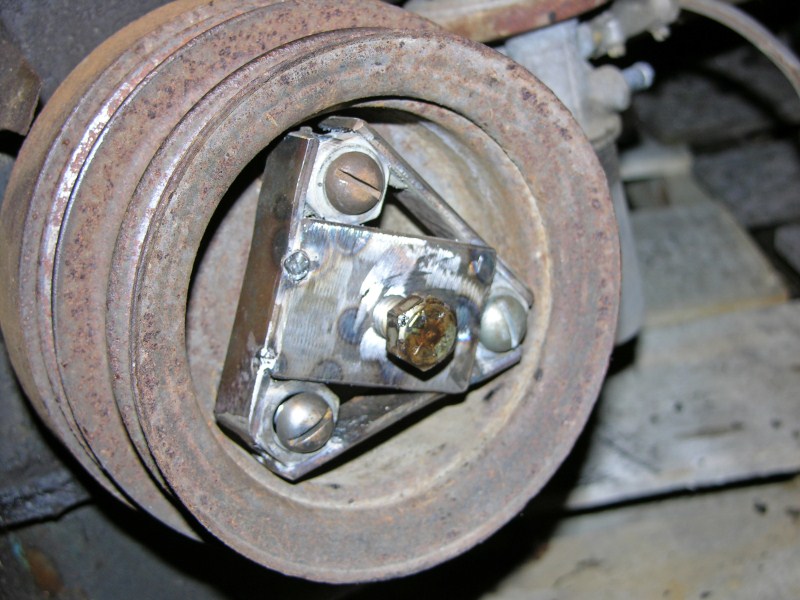
As you turn the jack screw in, the damper pulls off the crankshaft.
Let's see behind it...
 #12
#12
Yep, it's coming...
 #13
#13
After removing the puller, you can see witness marks on the
Crankshaft bolt head (from the jack screw). Don't forget to replace the three
grade 8 pulley
bolts.
 #14
#14
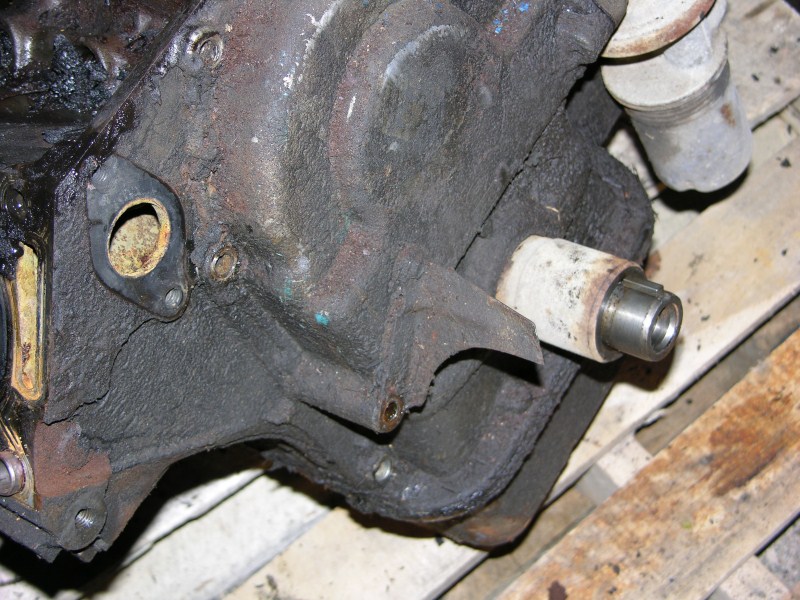
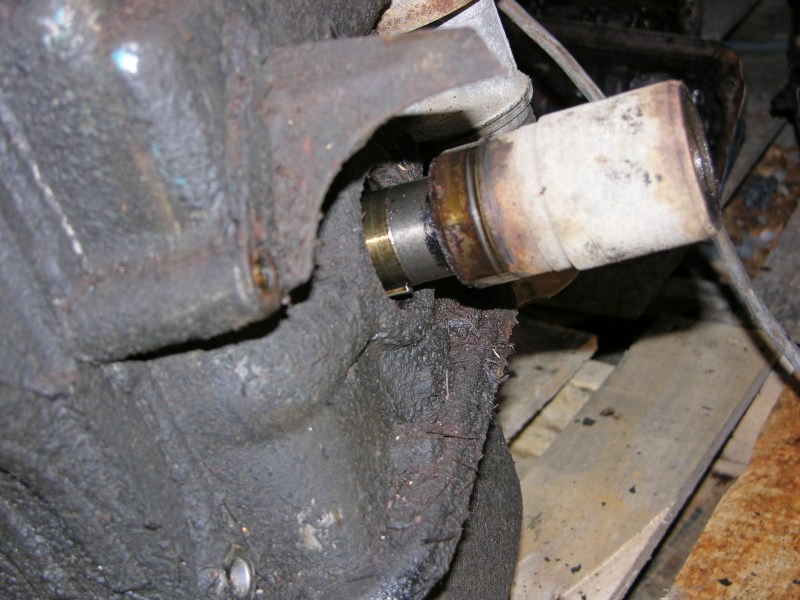
Now it's off, and the seal sleeve is next. Remove the crank
bolt, put the large washer back on, label and bag it. This is
an important bolt you really don't want to replace because they are
rare and not many places sell new ones.
 #15
#15
I rotated the crank
so the key faces up.
 #16
#16
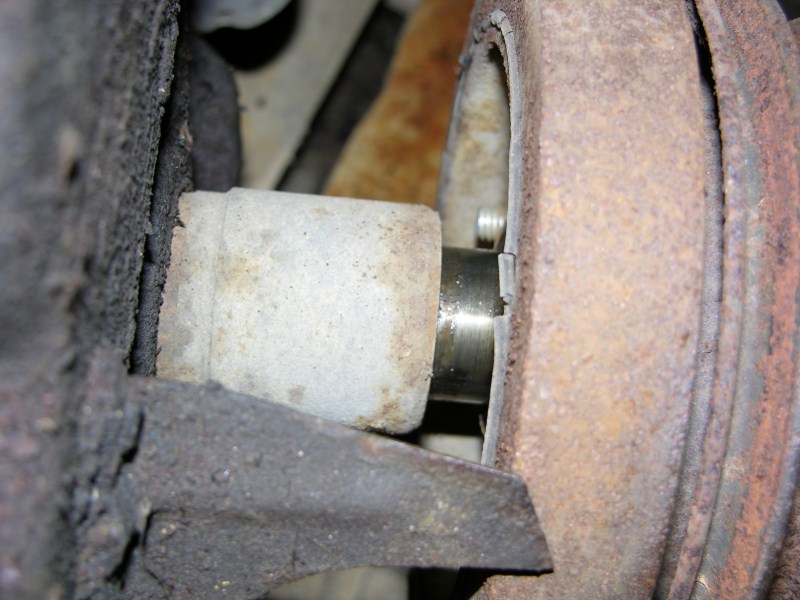
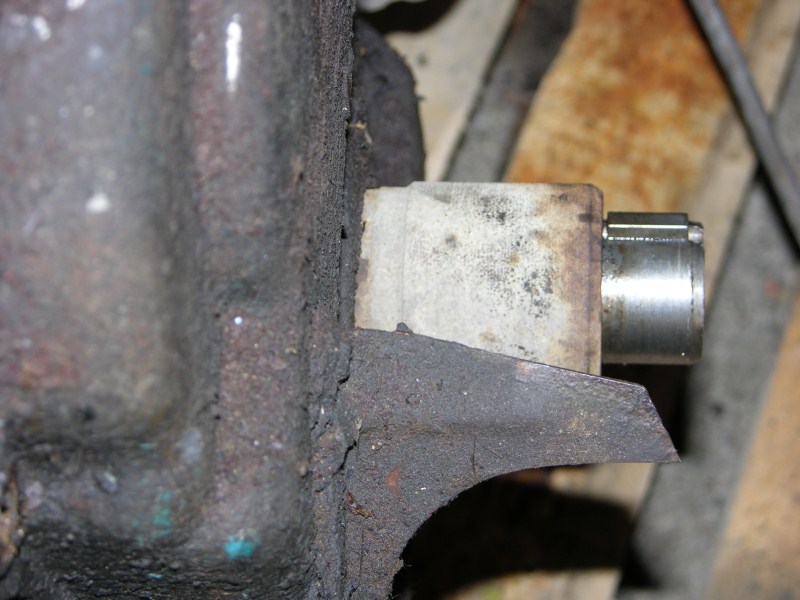
I can feel the sleeve
is loose... The only thing holding it back from sliding off is
that key.
 #17
#17
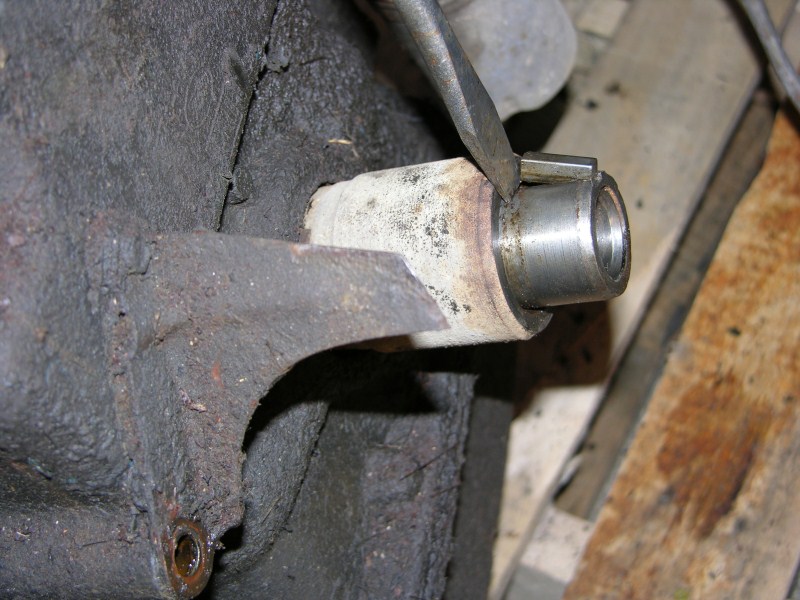
A simple screwdriver pries it out and the sleeve comes sliding out
by hand. SAVE THE KEY. I've heard discussion about how hard this sleeve is
to remove. Once the key was removed it slid off by hand.
 #18
#18
Why is this part necessary? GM engines don't have one.
It became evident when I re-assembled the timing cover. The
oil pan has a (partial) gasket on the front lip and the big
'horseshoe' gasket goes against the block. Without the sleeve,
it's easy to lift the cover up, and drop it down on the oil pan.
This keeps the gaskets neatly in place before bolting it up.
 #19
#19
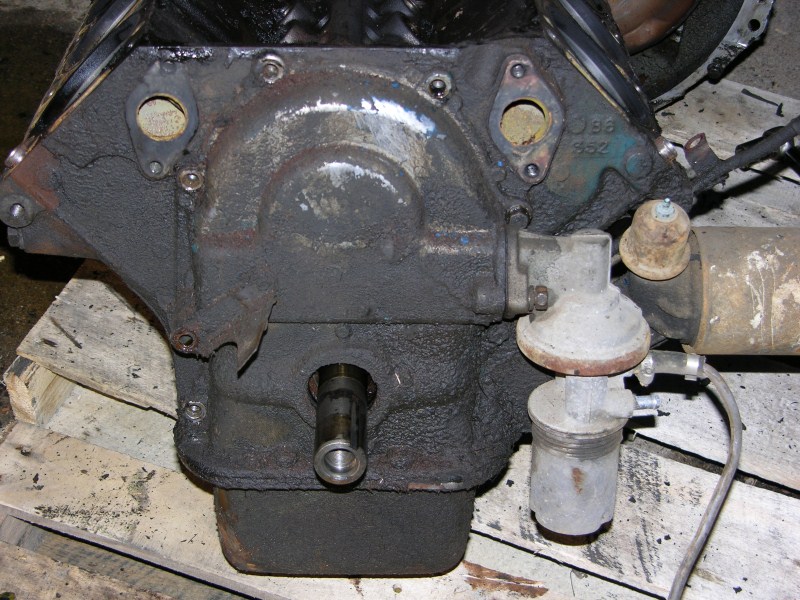
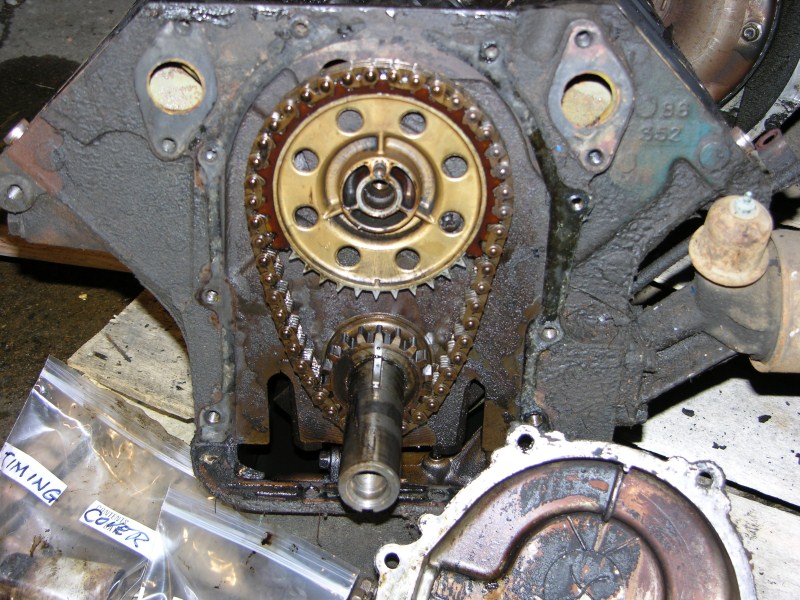
Now, remove the Fuel Pump and all the Timing Cover bolts, especially
the four on the bottom (going through the oil pan). NO
FORCING, this cover comes of easily once all the bolts are removed.
Just break the gasket seal and it's off.
 #20
#20
One more bolt and it's off.
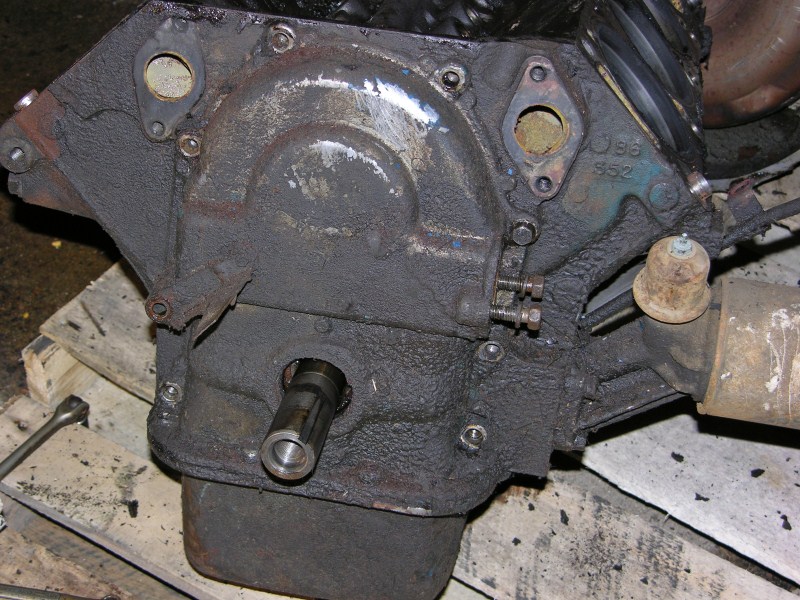
 #21
#21
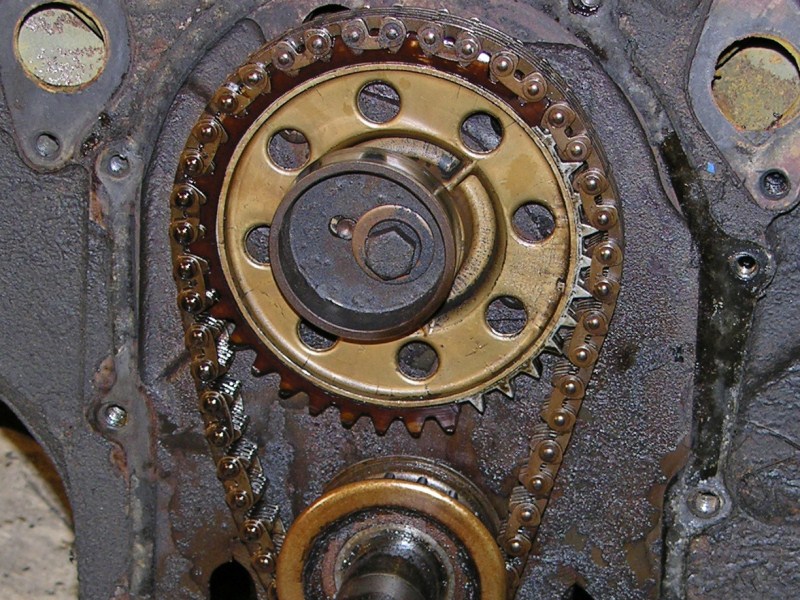
This is an "Ah, HA!" moment for me. Look close.
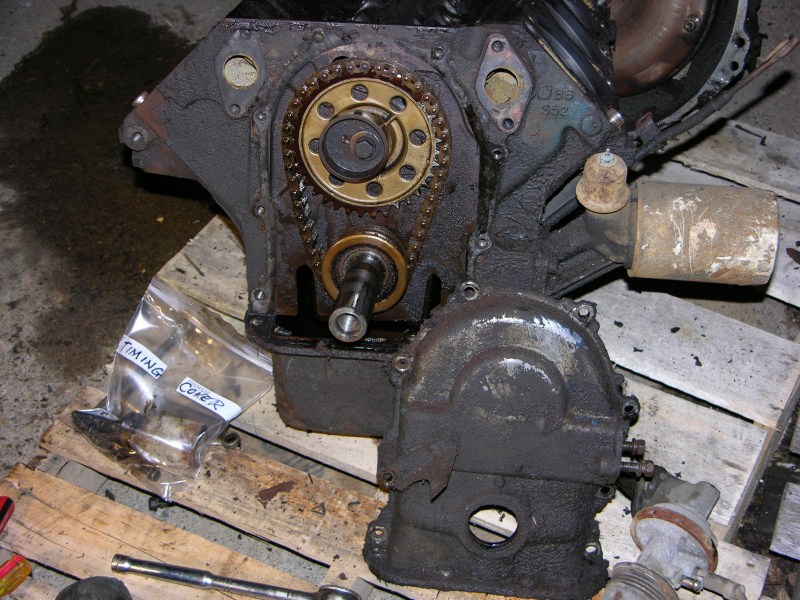
 #22
#22
Look even closer... Half the nylon cam sprocket teeth are MISSING!
Back in the '70's all the big-3 engine plants used Delrin nylon cam
sprockets. They were supposed to reduce noise and wear longer.
The problem was, they would typically get brittle and self destruct from the engine
heat. If timing jumps and valves are open far enough for the pistons to collide
with them, it's a major catastrophe. This engine was shakin'
dice.
 #23
#23
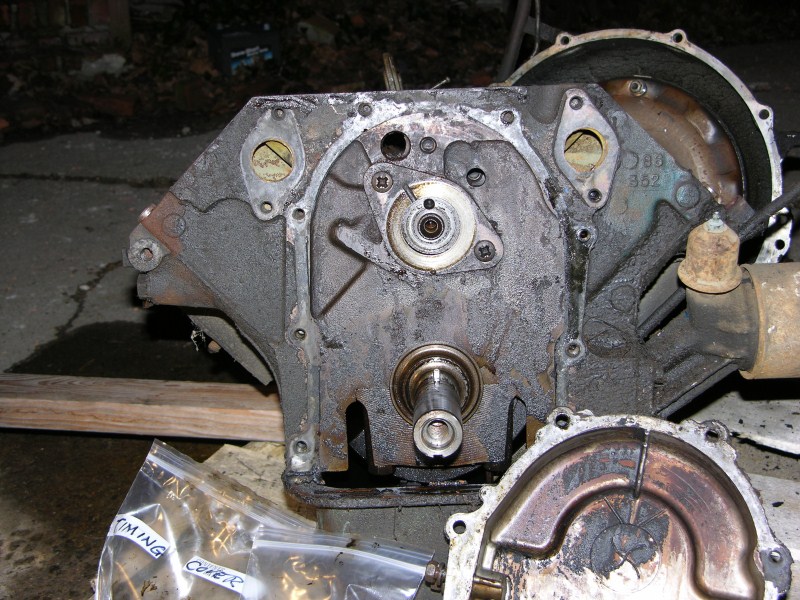
Pull off the oil slinger on the crank, loosen the Cam bolt, and pull
the sprockets off. No puller is necessary. I used two
screwdrivers behind the cam sprocket. Label and bag the parts.
Do not throw any old parts away until your engine is done.
 #24
#24
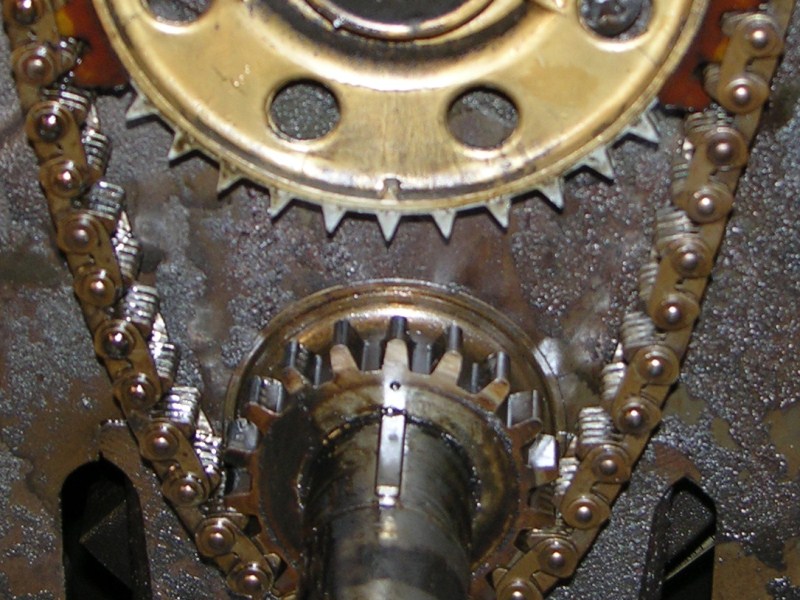
I'm amazed the timing marks still match.
 #24
#24
1/3 of the nylon is missing. I'm replacing with a True Roller
Timing Set, made with iron and steel, so this will never happen
again.
 #26
#26
To remove the Cam, go to "CAM REMOVAL" on the Home Page.
Top of
Page
BACK TO HOME PAGE