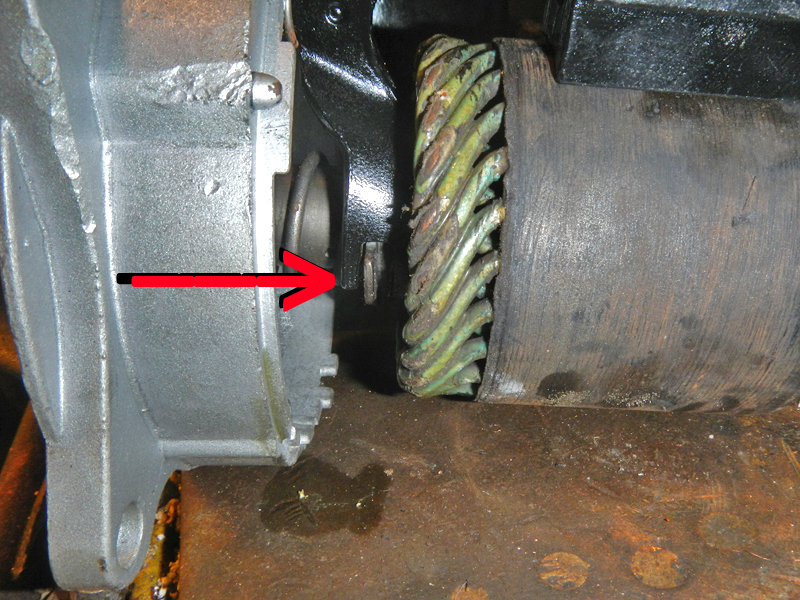
The original Starter Motor was sadly neglected but it worked ok.
The brushes were slightly worn on an angle but still had lots of life left. It is very important to change brushes before they
wear down and cause damage to the commutator segments. New brushes are about eight bucks for the set so, a new set it is. The nose bushing was worn out so I replaced it. The armature shaft was missing the "C" clip and Bendix gear stop, so I replaced those parts as well.
 #1
#1
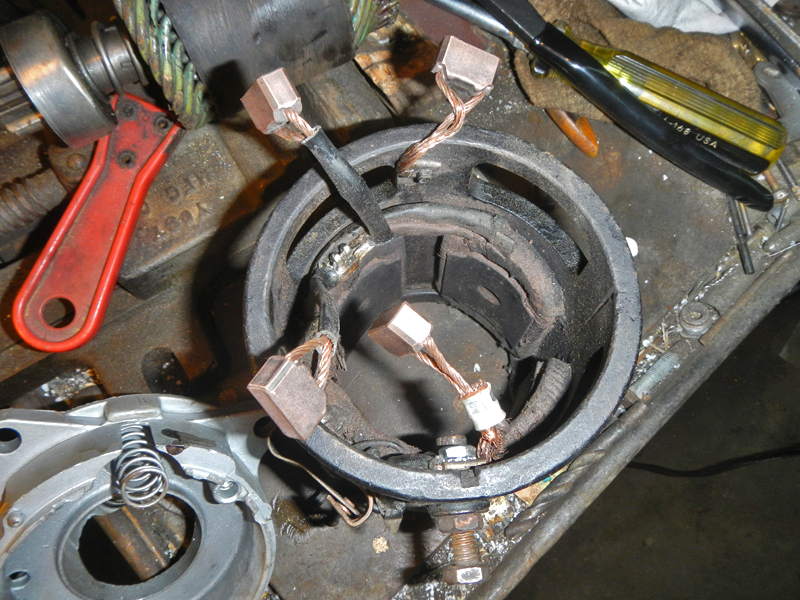
These are new brushes, already connected to the field windings and waiting for assembly. Notice that Starter Motor brushes are
not made of carbon. Because they carry hundreds of amps, these brushes are carbon-impregnated bronze, and manufactured short, to keep resistance at a minimum.
 #2
#2
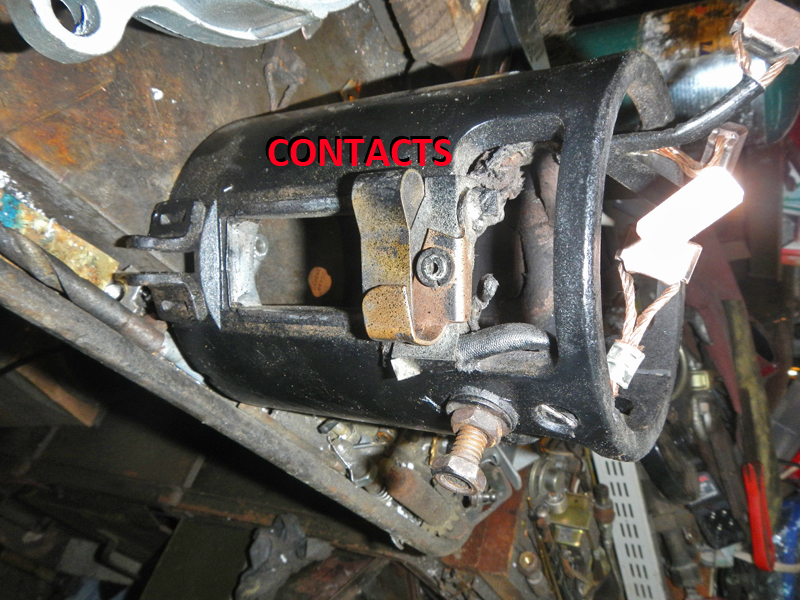
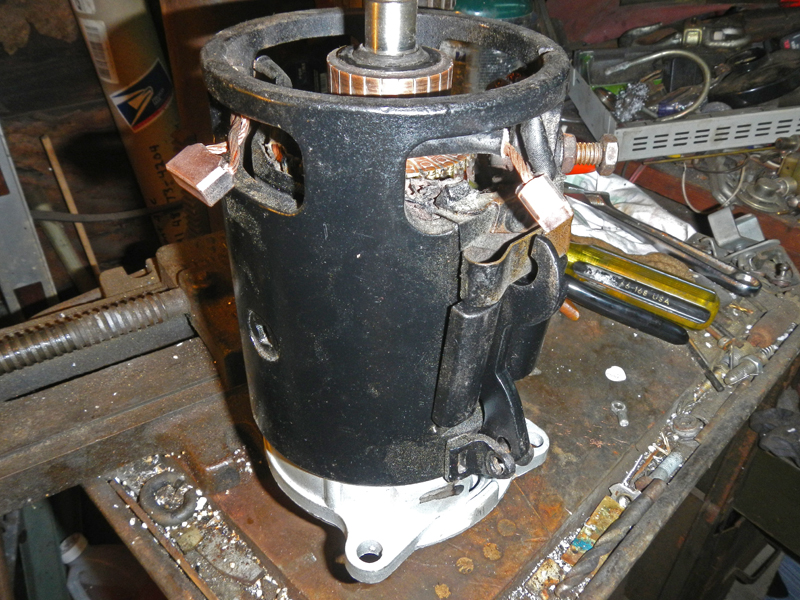
This starter housing is in great shape after a little cleanup, paint, and new brushes. Typically, Starter Motor insides get coated with pieces of brush material and oil. This 'dirt' is highly conductive and a buildup can cause a short circuit in the Field or Armature
windings. A little low-cost preventive maintenance goes a long way. There is no reason to neglect any Starter Motor, but most owners wait until catastrophic failure (which usually happens far from home on Sunday, when nothing is open).
 #3
#3
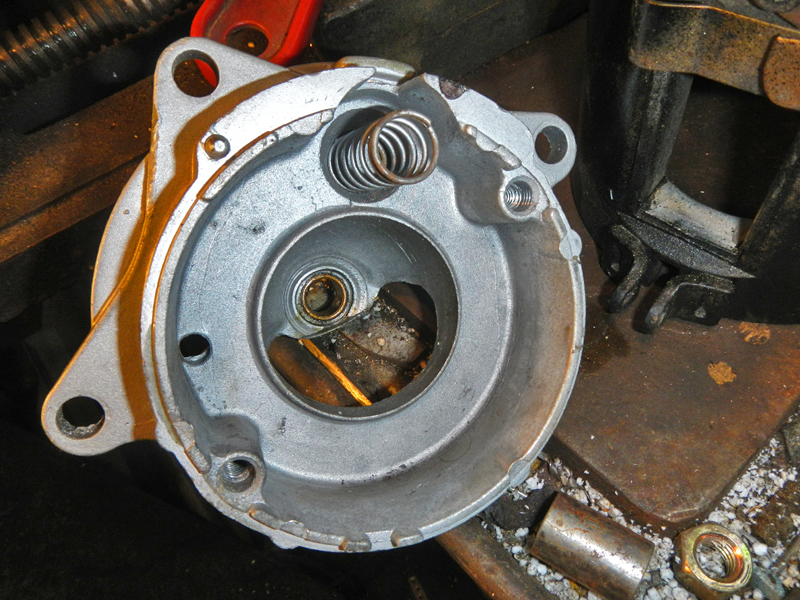
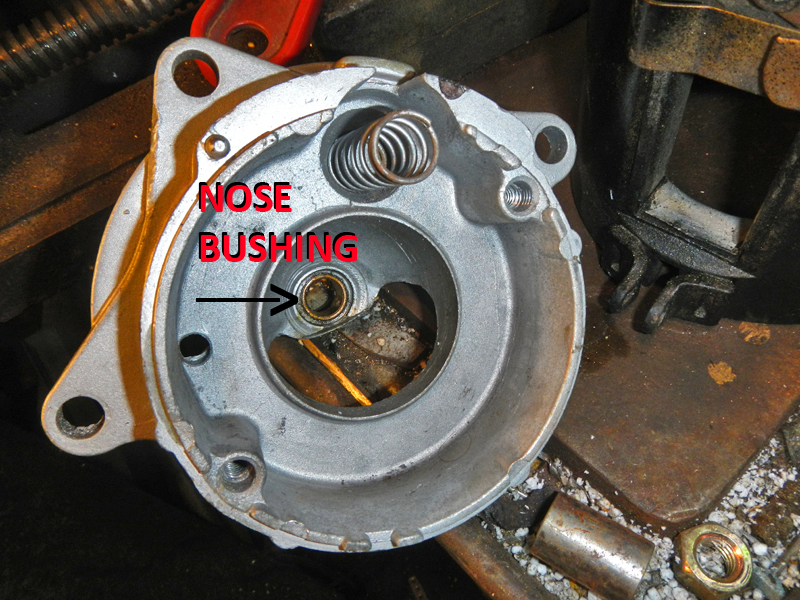
This is the front nose piece.
 #4
#4
I replaced the old worn out bushing, and greased the new.
 #5
#5
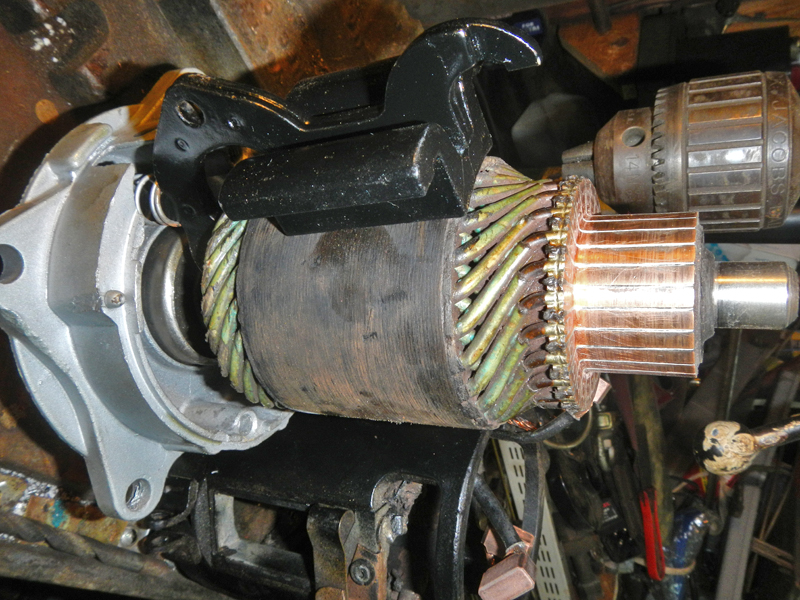
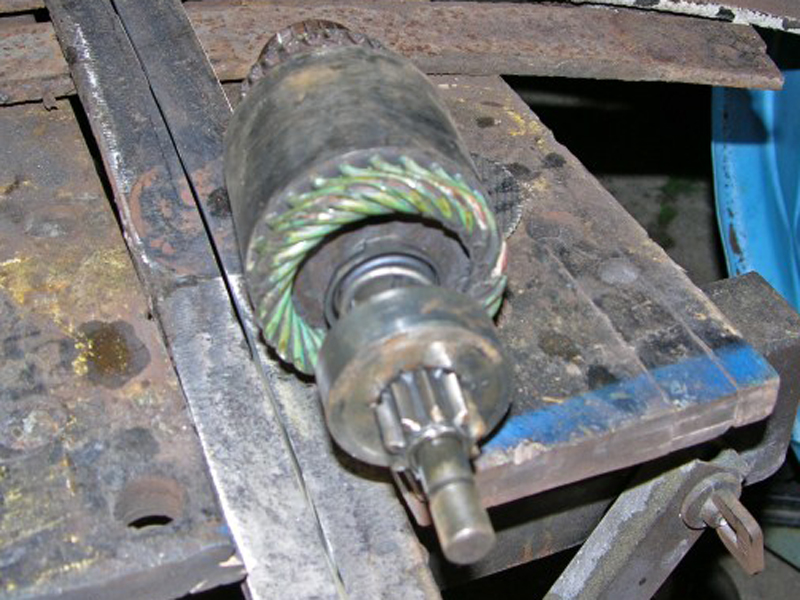
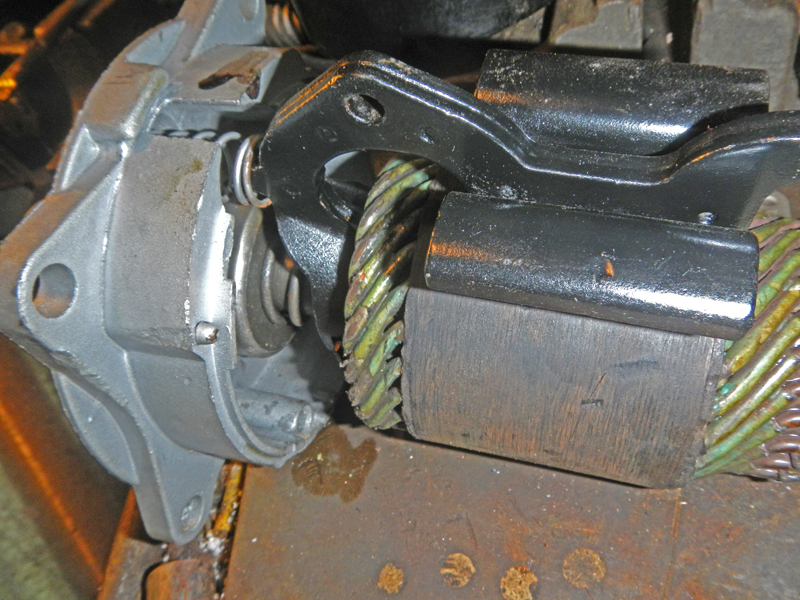
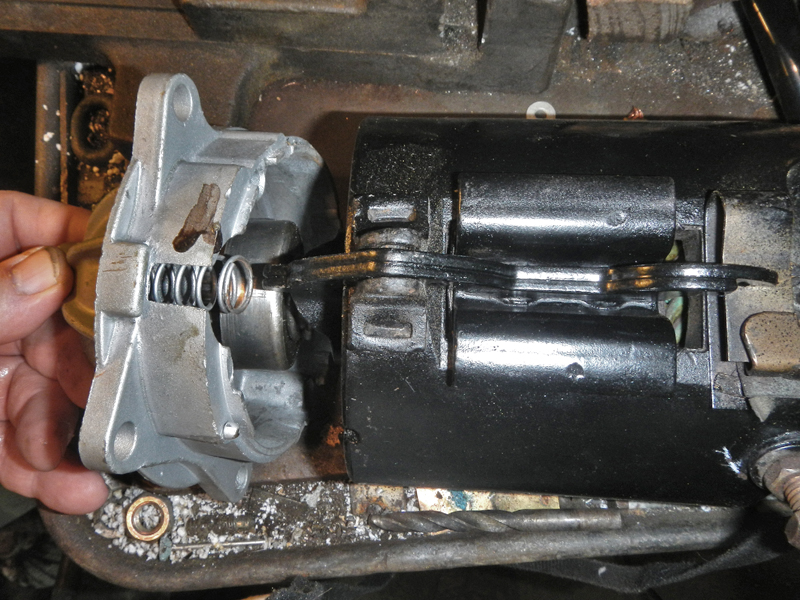
This is the armature and Bendix gear solenoid, mocked up for assembly.
Old Ford Starter Motors were Centrifugal, meaning that the flywheel actually pushed the Bendix gear out of the way when the flywheel
teeth were going faster than the Starter teeth.
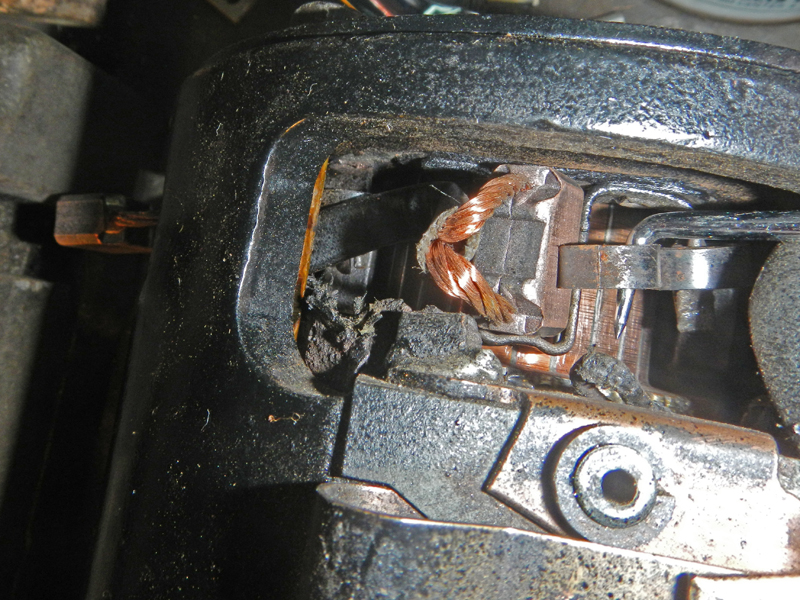
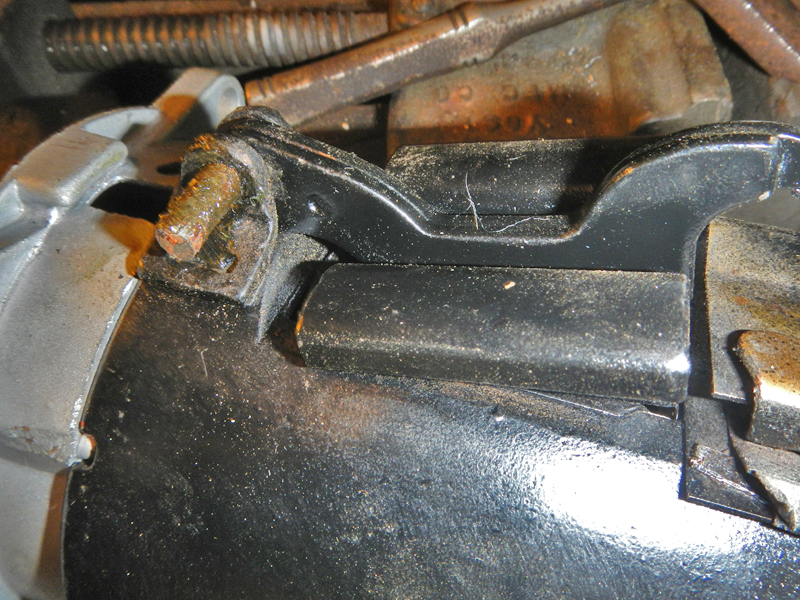
This is the next generation starter with a spring-return Bendix gear. The solenoid does two important jobs; when current is applied to the Starter Motor, the field winding pulls this clapper down hard. The pivot pin on top causes the front end fork to push the Bendix gear forward while the rear end pushes a large contact open. Solenoids need tremendous current to make enough magnetism to pull this clapper down. Once it's down, the open contact removes power to the solenoid because very low magnetism from the spinning Armature is enough to hold the clapper down and engage the teeth into the flywheel. When the Key Switch returns from START, power to the Starter Solenoid stops current to the Starter Motor and a spring pushes the Bendix gear away from the flywheel teeth.
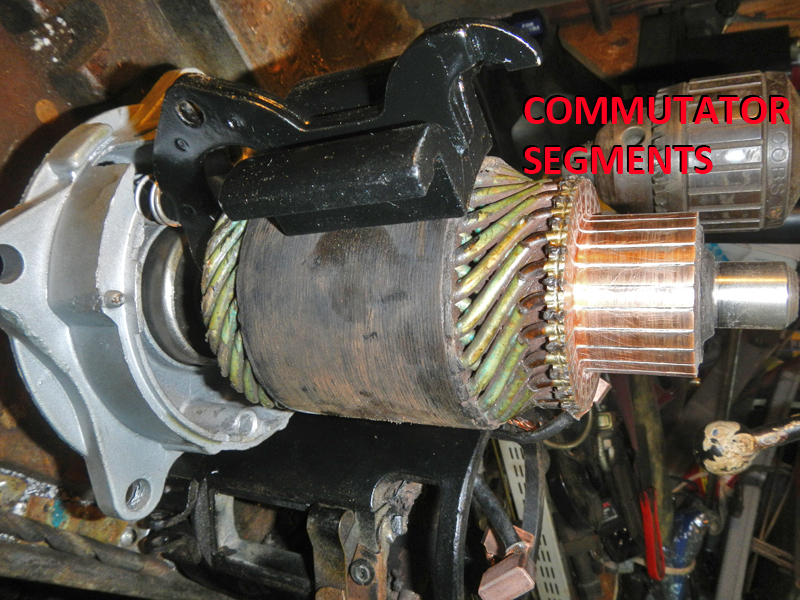
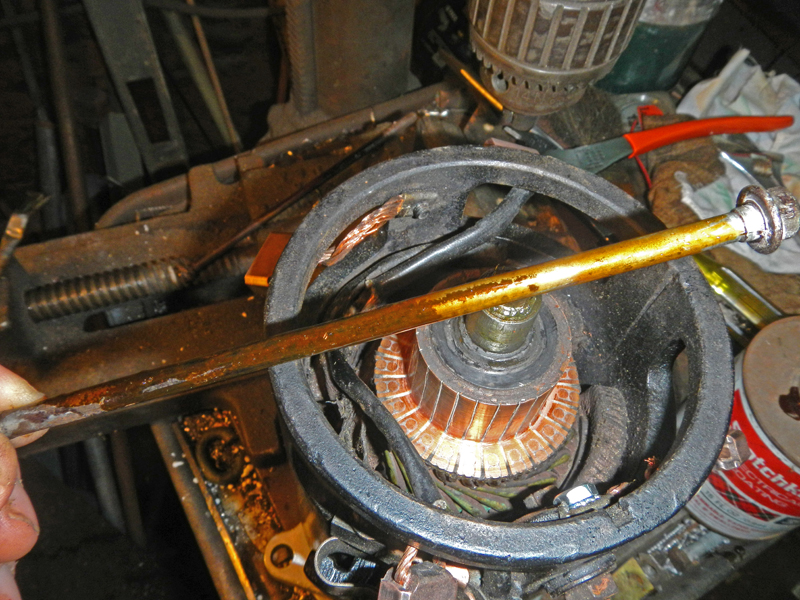
Notice the commutator segments aren't tapered, egg-shaped, dished, or burned.
This commutator looks really good.
 #6
#6
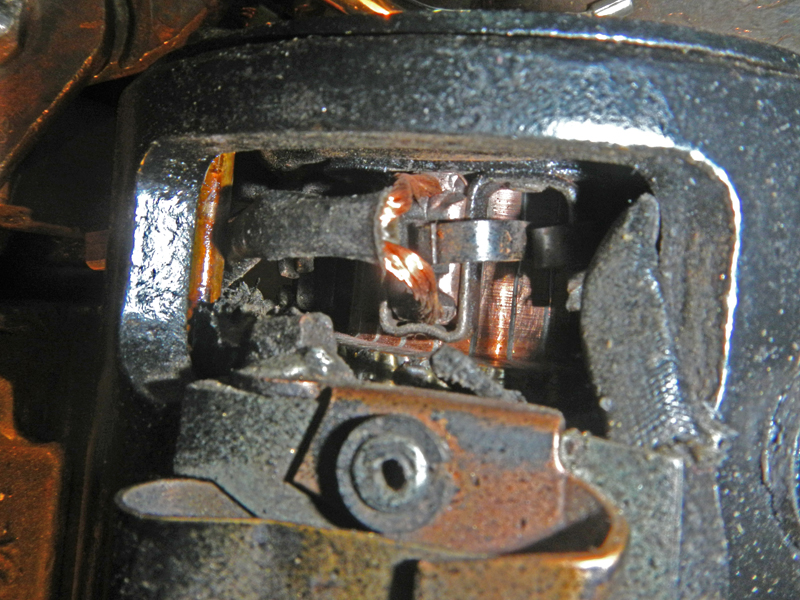
The copper segments are dark. This is a conditioned coating that takes a long time to form and should NOT be removed. Only in extreme conditions should commutator copper segments be tooled or sanded on all commutators.
 #7
#7
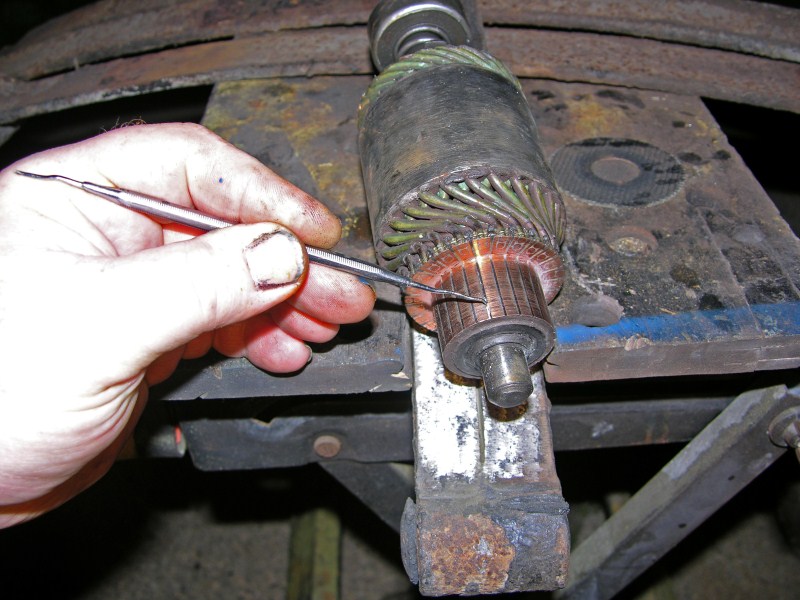
I have undercut the insulation between each segment to promote good brush contact.
 #8
#8
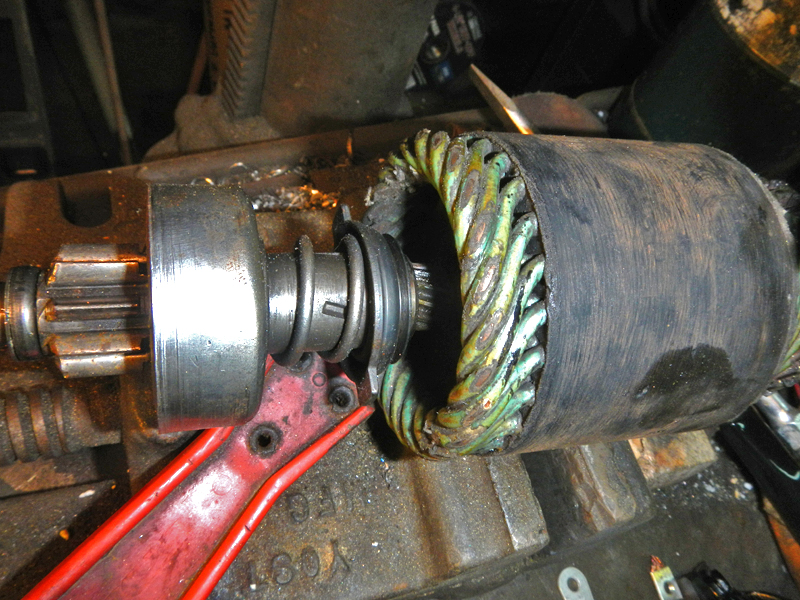
With the 'C' clip gone, I removed, cleaned, lubed and reassembled
the Bendix gear.
 #9
#9
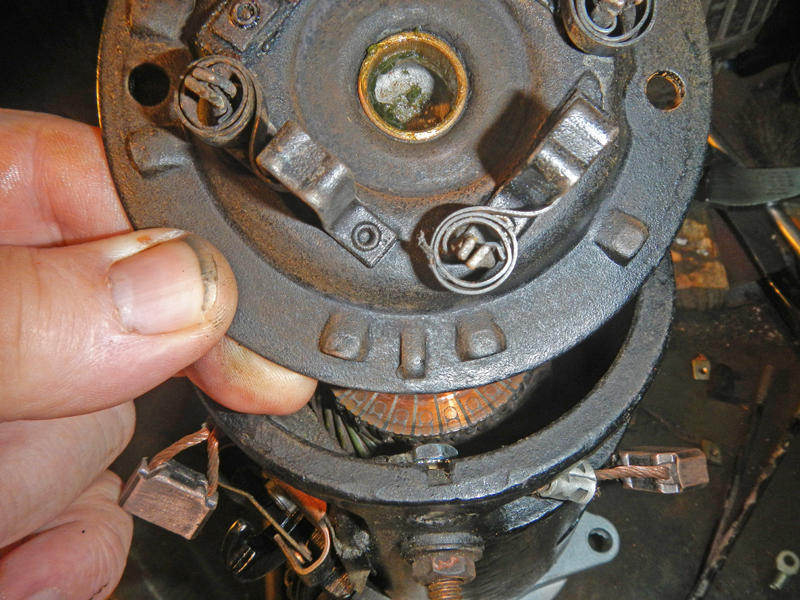
This view shows the two tabs that the fork uses to push and pull the Bendix gear.
It's ready to go.
 #10
#10
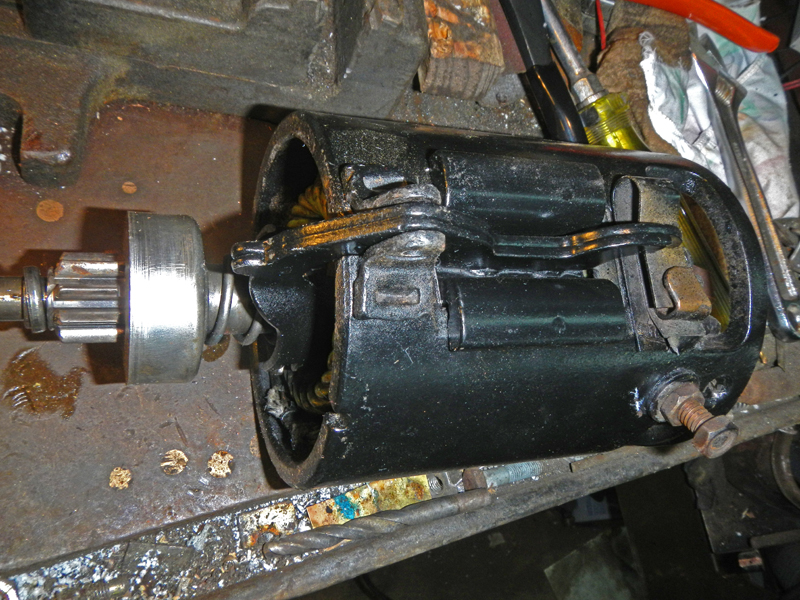
This view shows how the solenoid fork engages the tabs.
 #11
#11
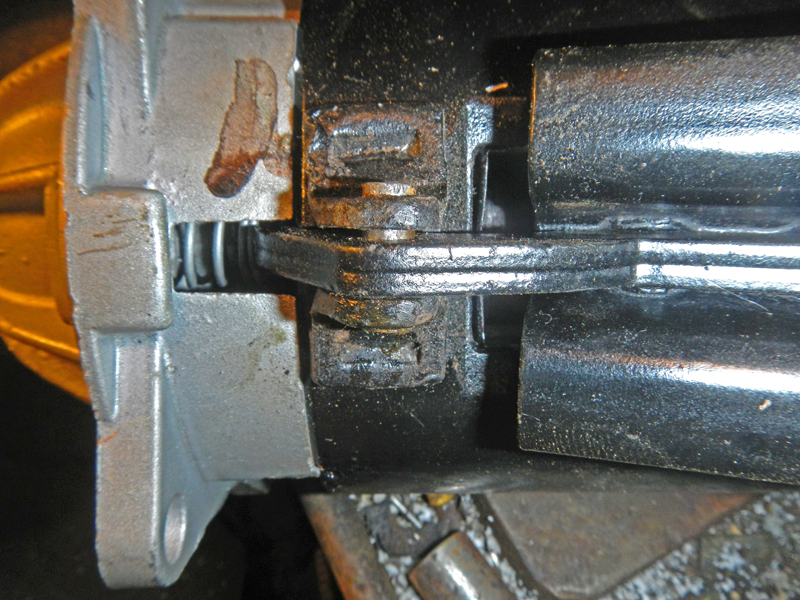
Here, the nose piece shows the return spring engaged in the solenoid's fork. This will all come together when the
housing is in place
 #12
#12
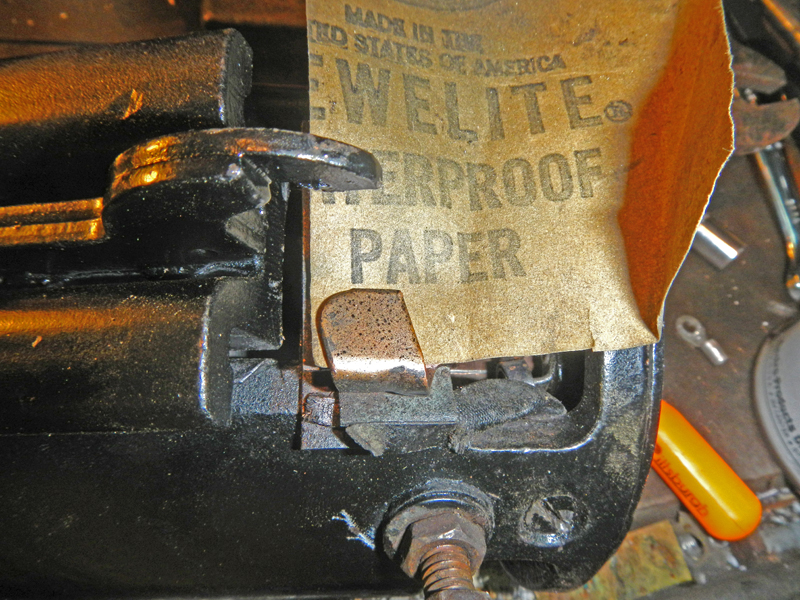
This is the part where the energized solenoid presses down in the back to open the contact.
 #13
#13
Together, and waiting for the nose piece and the pivot pin.
 #14
#14
Align the spring with the solenoid fork, and stand it on end...
 #15
#15
There are alignment tabs and holes on each piece so they can only go together one way. Notice the pin is left out until
the end.
 #16
#16
The embosses center the brush holder/back plate.
 #17
#17
Now I have greased the bearing and am ready to screw the whole
thing together. But first...
 #18
#18
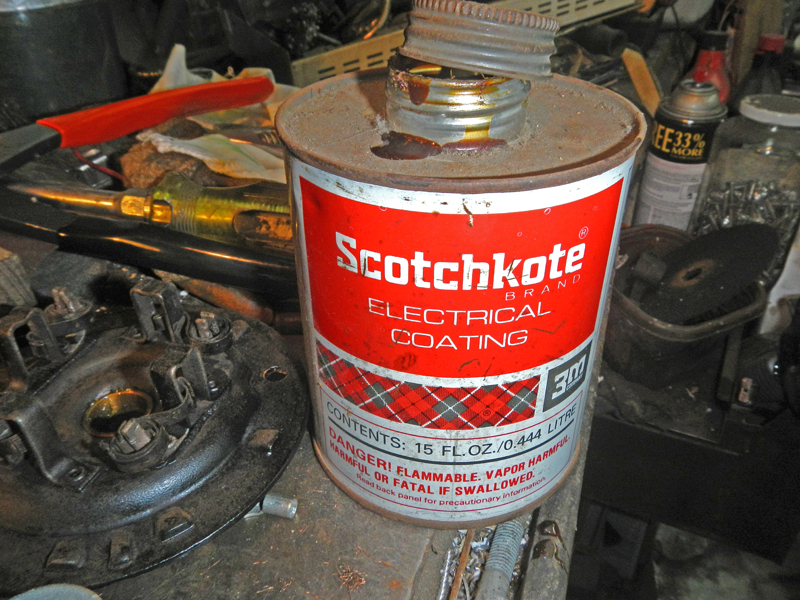
Any parts that touch electrical components get a coat of insulation paint. GE makes Glyptol but I use Scotchkote.
 #19
#19
I've used this stuff for years... made by 3M.
 #20
#20
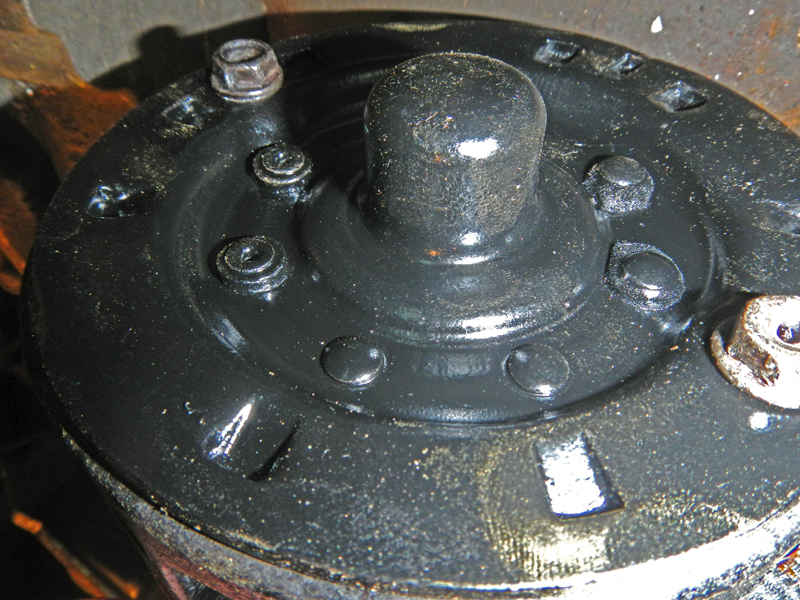
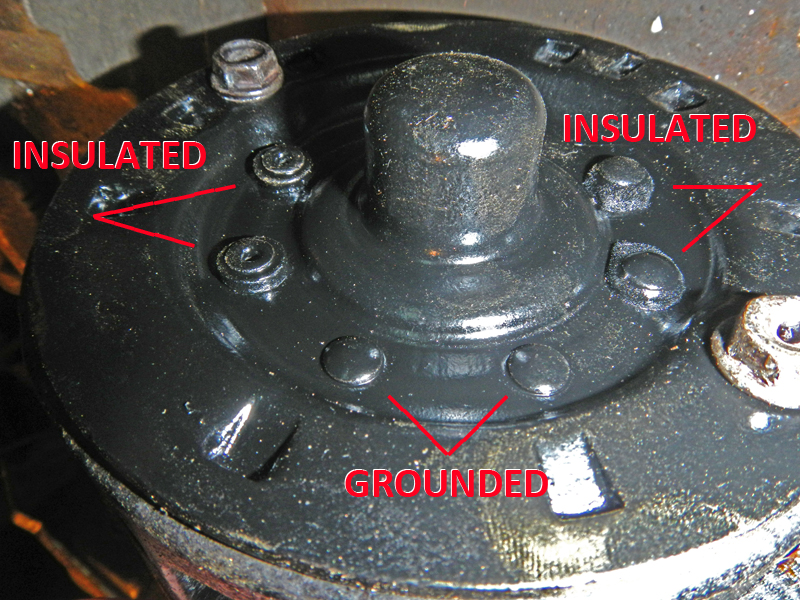
Everything lines up and the bolts are tight. Notice the rivets that fasten the brush holders. Half are insulated and the other half are grounded.
 #21
#21
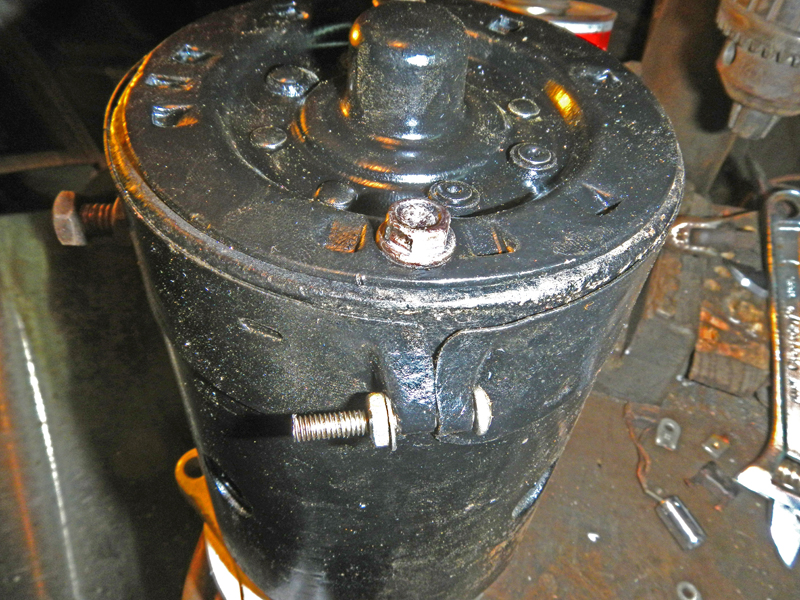
This is what makes the case ground since there is only ONE POST. So a word of caution: Too much paint can insulate your starter motor and prevent it from working at all. Do NOT paint the screw threads.
 #22
#22
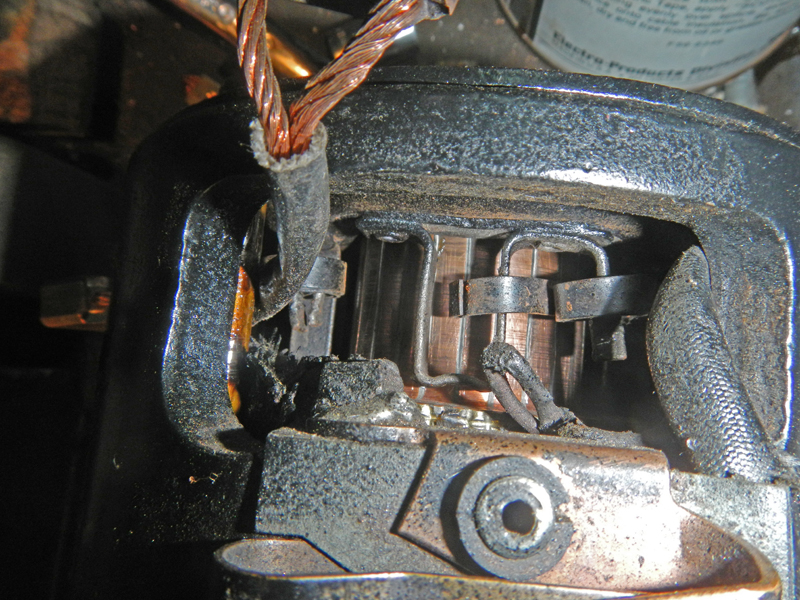
Two brushes are insulated with a black sleeve and are soldered internally. The other two brushes have bare braided wire. Notice I have each brush hanging out each window. The bare brush with no insulation goes in the holder with NO insulation under the rivet. Let's start with the insulated brushes...
#23
Here's a picture of an empty brush holder with the spring inside. Get (or make) a tool with a 1/2" bend at the end.
Put it under the spring and pull the spring out of the way so the brush can slide down the holder.
 #24
#24
The brush is almost in the holder...
 #25
#25
Here, the brush is neatly seated. Now, hook under the copper wires and gently pull up. The travel and return
should be smooth with no snags. If the brush hangs ANYWHERE, correct the problem with a file or sandpaper.
Straighten the pigtails so they don't touch any metal, but they will travel freely with wear.
 #26
#26
Go around and do each brush. Here, I am testing a 'ground' brush.
 #27
#27
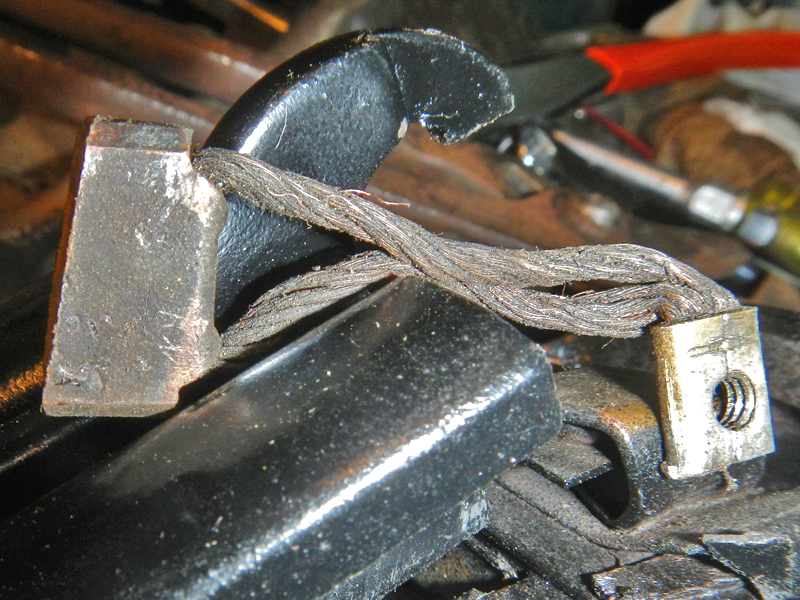
Here is a brush I removed. This is exactly what I want to see. The brush wore on an angle but it preserved the
commutator.
 #28
#28
After the brushes are in and tested, it's time to clean the contacts and insert the pivot pin.
 #29
#29
The pin is a 1/4" piece of straight round stock. This one looks rusty, but that's really grease.
 #30
#30
Here it is together. I peened the ends of the pin a little but that isn't necessary.
Notice how the spring raises the solenoid clapper, waiting for power.
 #31
#31
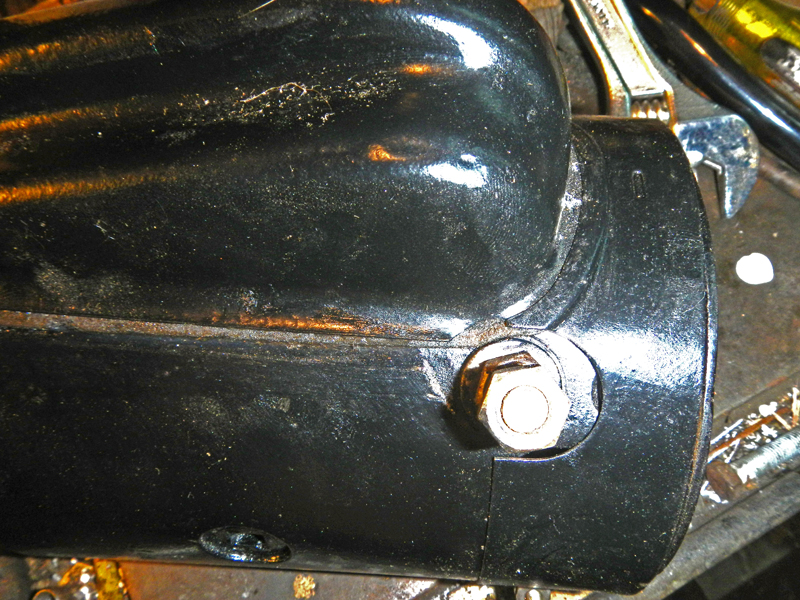
This cover traps the pin in place and covers the mechanics. When placing the band on the back, pay attention to the +12-volts
post for clearance all the way around.
 #32
#32
I used a stainless bolt, washer, & nut on the band. The bolt needs to
be long for future maintenance .
CLICK HERE
to return to Home Page
Top of Page