![]()
Ford Headlight Switch
Read this through before working on your Headlight Switch.
***(Knob Stick removal procedure and
optional Dimmer Bypass instructions at the end.)
PLEASE DO NOT SAW THE STICK OFF. If you
follow procedure, it comes out easilly.
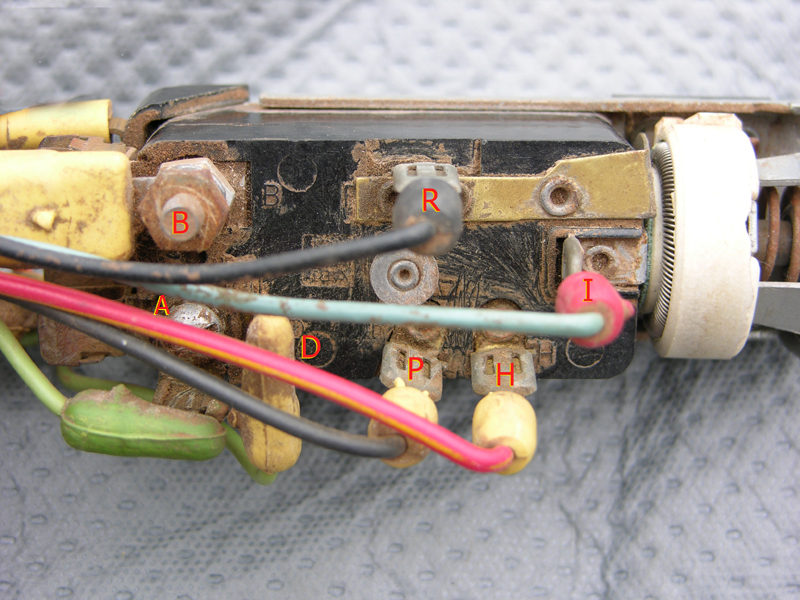
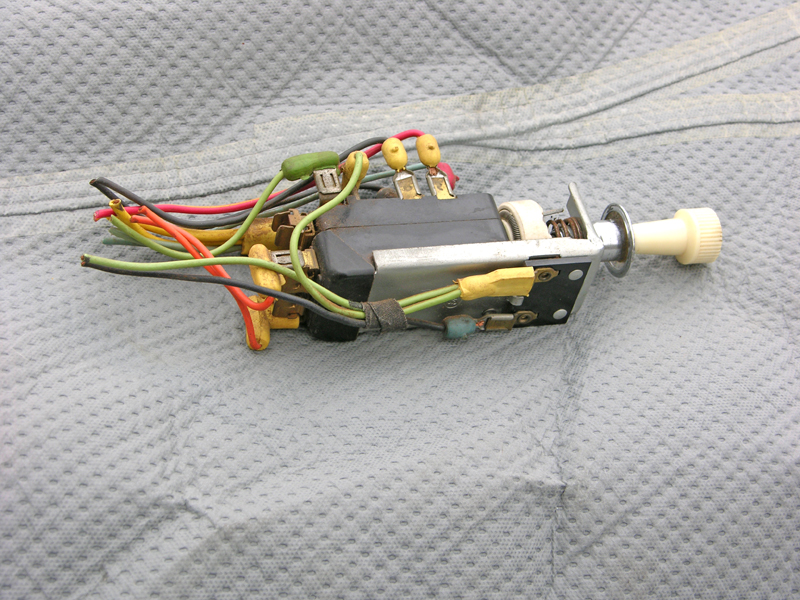 #1
#1
I bought a 'spare' headlight switch for my '59 from a
salvage yard.
 #2
#2
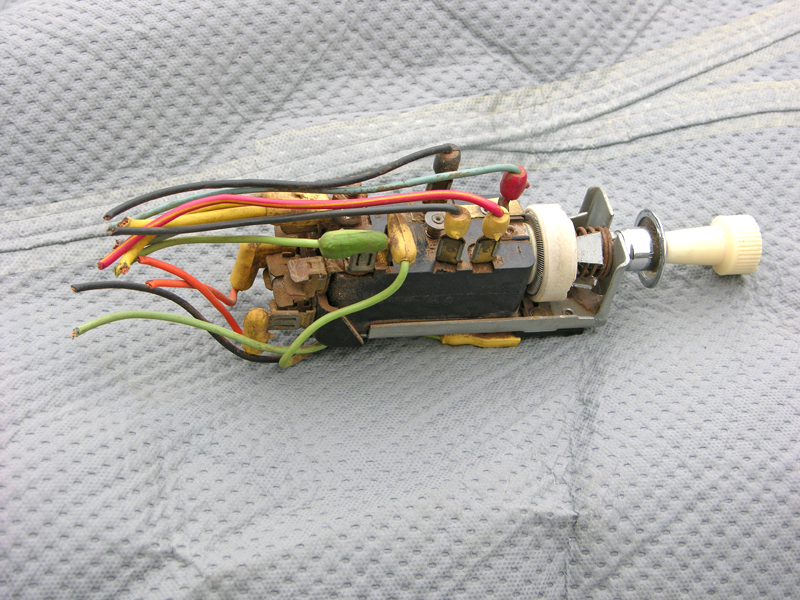
The switch is original, and all the wires are intact,
which is great because I can see wire colors.
 #3
#3
...a word about Ford's color scheme: E.g. If the print calls for an
Orange/Yellow wire, that could mean one of two things; the wire will be
orange with a yellow stripe OR the wire could be solid
orange with a yellow CONNECTOR COVERING.
 #4
#4
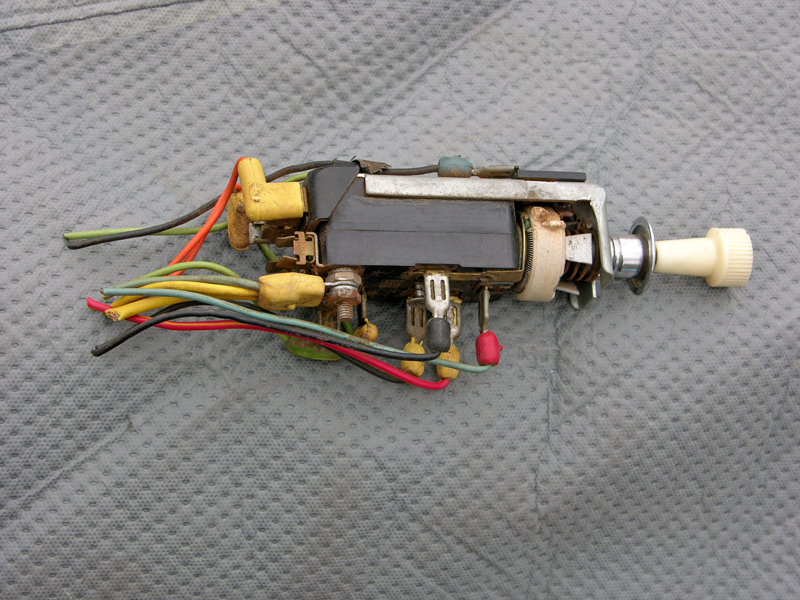
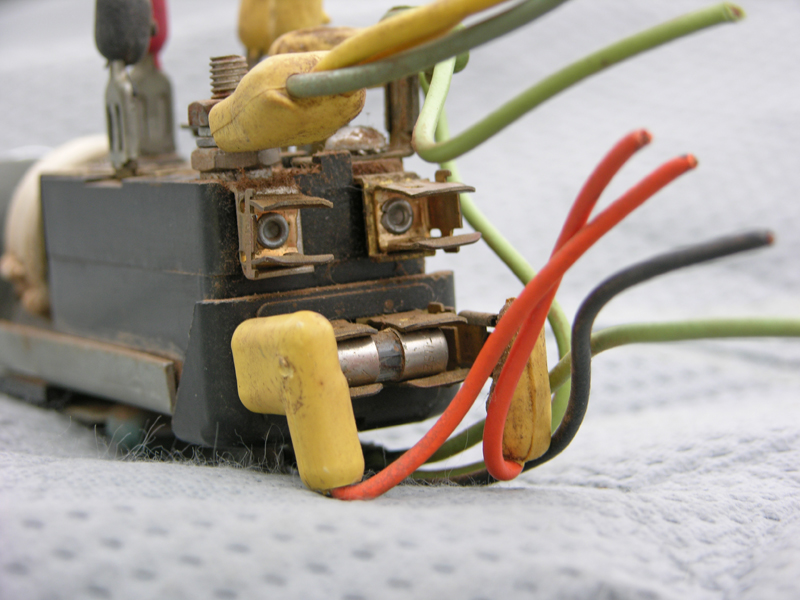
Notice two fuse
holders mounted to the rear. The small fuse holder has two
connectors, so it is actually independent of the
switch. The longer fuse is powered by
the "Battery" post
and it feeds the "A" terminal.
 #5
#5
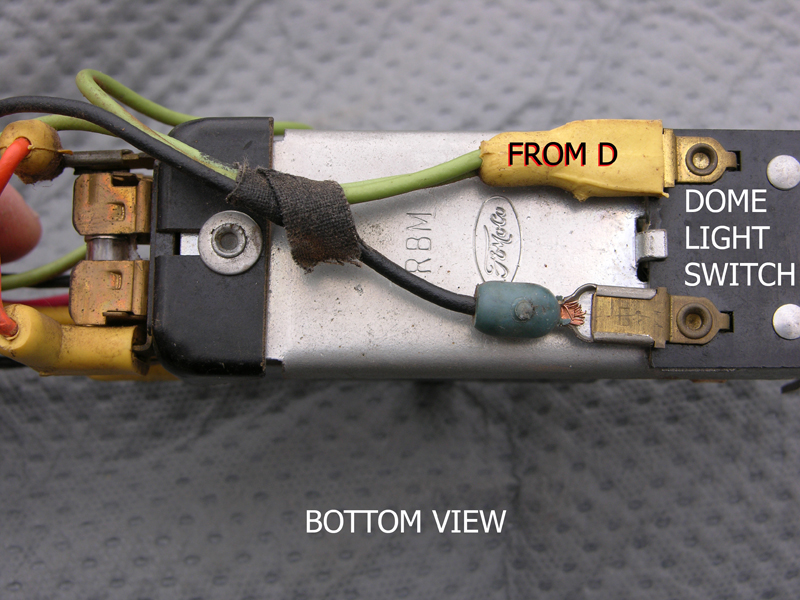
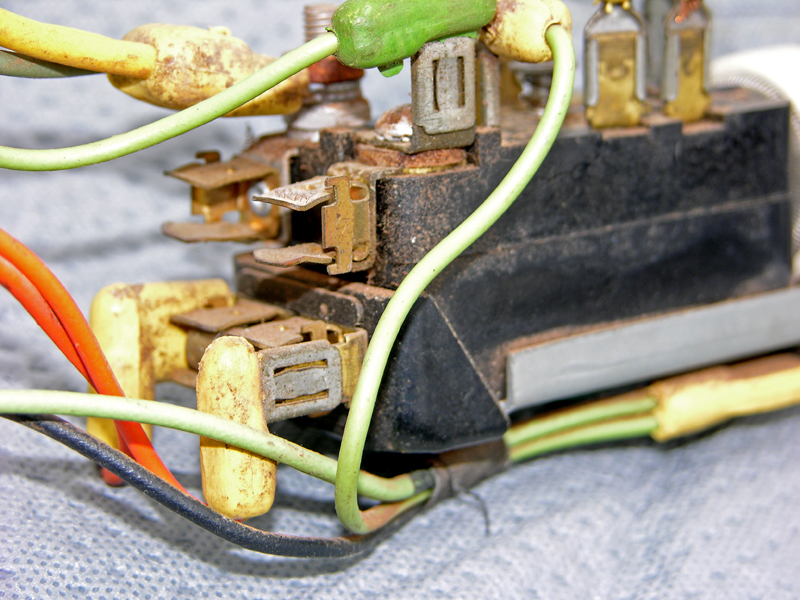
Let's make sense of the wiring. The bottom reveals
the wiring for the Dome Light on-off switch.
Green/Yellow is fused power from 'D' and Black/Blue feeds the Dome Light.
 #6
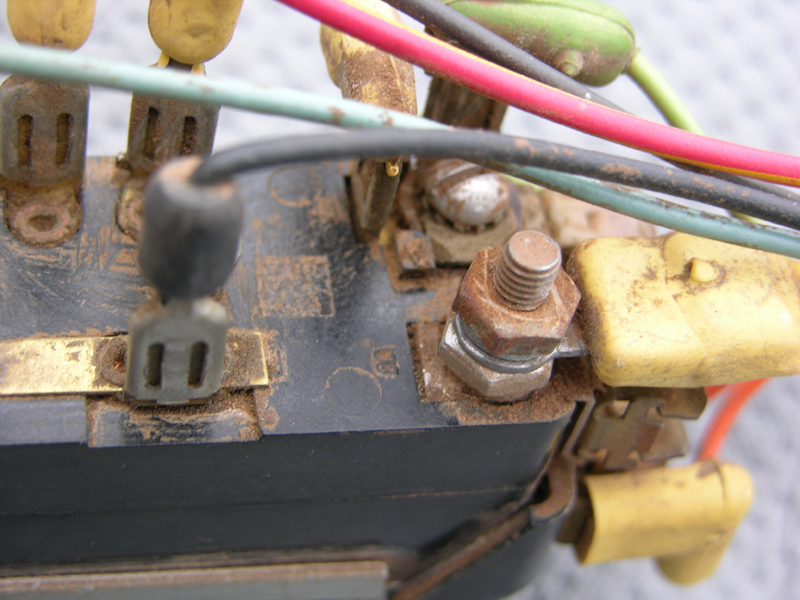
#6
"B" is direct power from the BATTERY at the starter
solenoid.
It feeds the long fuse on the back and a short jumper
wire feeds the Key Switch.
"A" is fused and it powers the Stop
Light Sw., Backup portion of the Neutral Sw., Glove Box Switch, Clock.
"D" is fused and it powers the Door switches and a short jumper that feeds the Dome Light Switch
"R" is (Rear) Tail Lights, license plate light and feed for the Dash Lights Rheostat
"P" is Front Parking Lights (only on when knob is pulled to the first
detent)
"H" powers the Headlights (to the High Beam/Low Beam foot switch)
"I"powers (dimmed) Instrument Panel Lights.
Pulled to the first detent, Front & Rear Parking lights shine, Instrument
Panel lights shine.
Pulled to the second detent (all the way out), Front Parking lights GO OUT,
Rear Tail Lights remain
on & Headlights shine.
 #7
#7
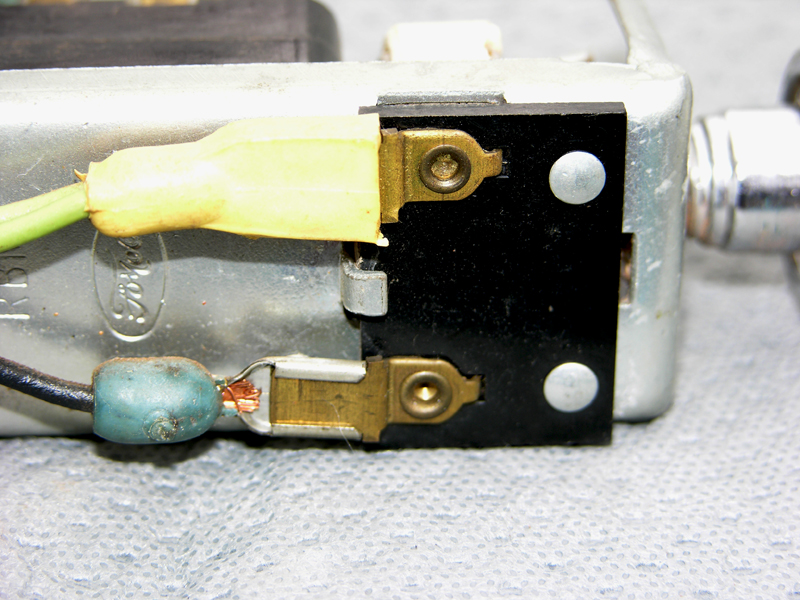
"B" is all-important. It is UN-fused power coming from the battery and it feeds
fuses AND the Ignition Switch. That is why it is a screw post.
There are NO fuses between this terminal and the battery, so be extra
careful not to short to ground.
 #8
#8
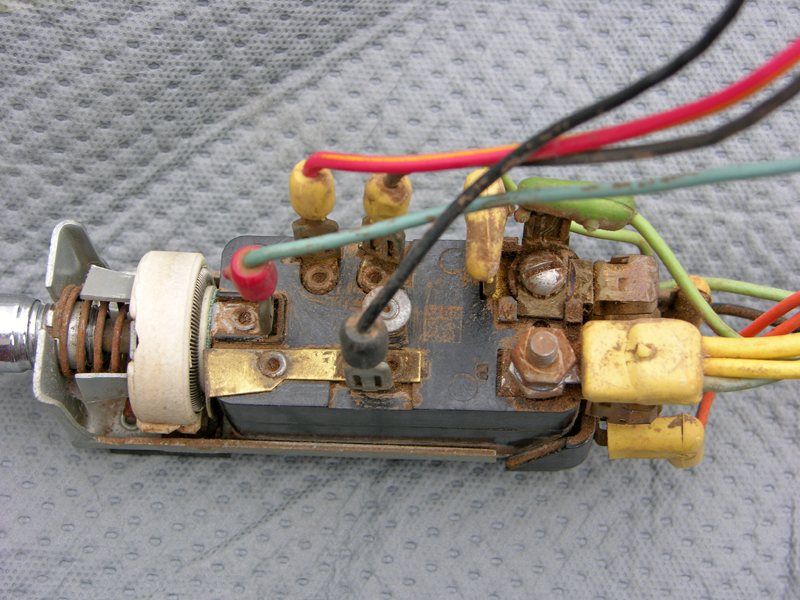
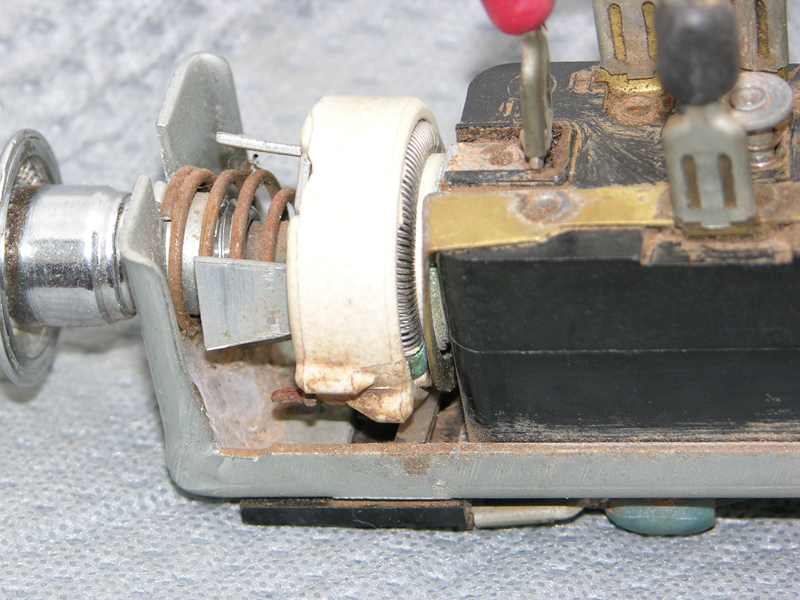
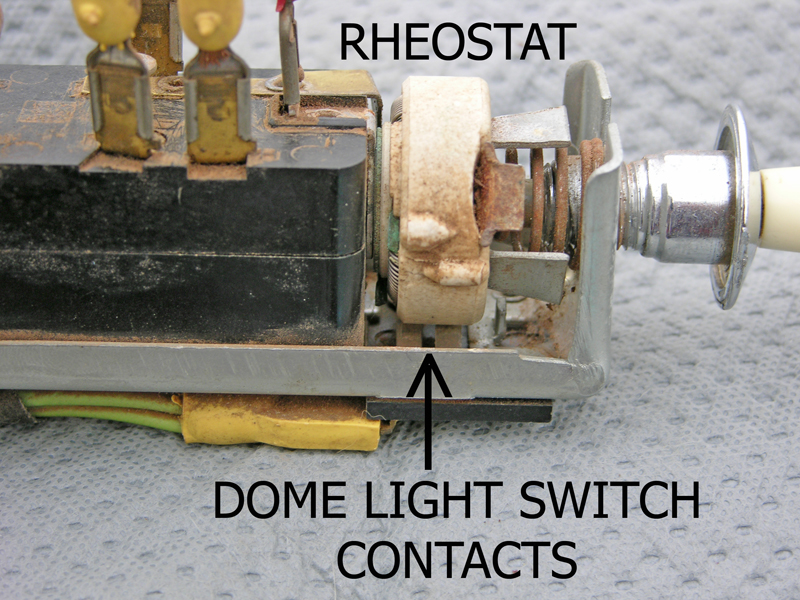
The next two pictures show the 'release button' for the
handle. It is located in the middle of this switch.
I want to point out the green patina between the Rheostat and the
red connector.
THIS corrosion is why dashboard lights commonly stop working. More on that later...
 #9
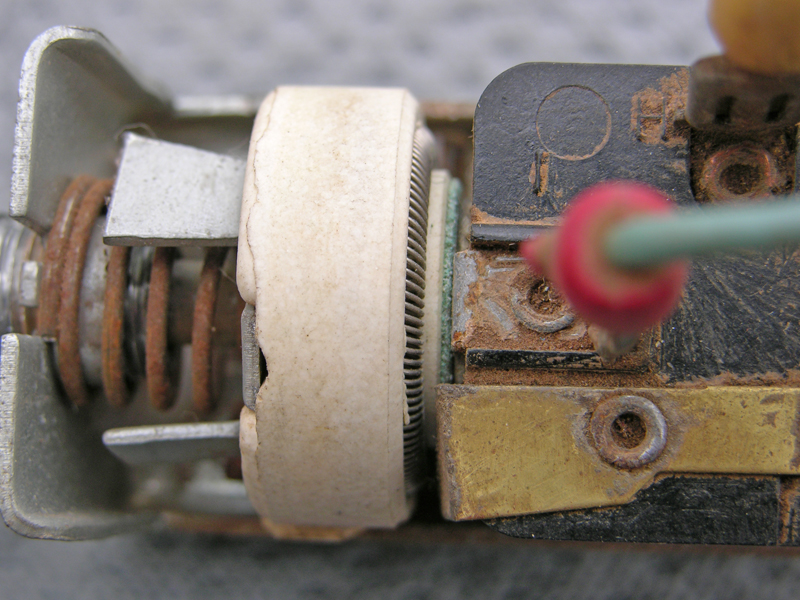
#9
The Rheostat
is removed by using a small flat-blade
screwdriver. Remove the handle, (the bezel should already be
unscrewed) and pull the spring over the flange, and the whole rheostat comes
out. The parts assemble one way so you can't get it wrong. Take
note of the plastic insulator (shown later in pictures #16 & 18).
 #10
#10
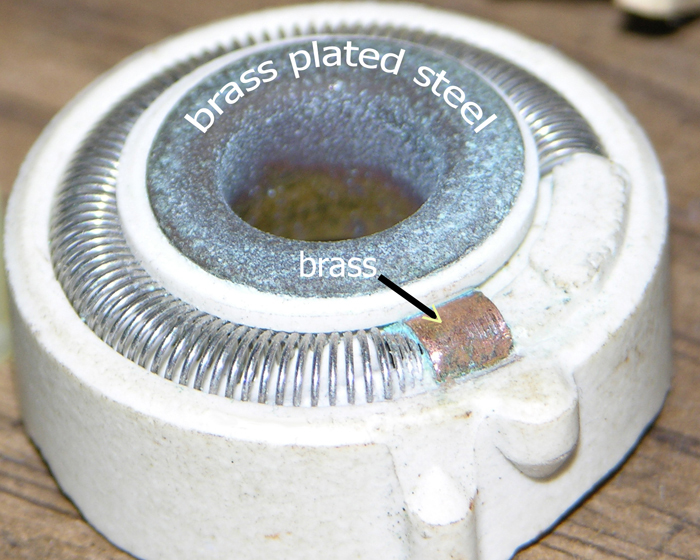
A closer look... Most folks believe the nickel/chrome wire (Ni-Chrome)
breaks and that is why their dash
lights fail. I have never seen a broken NI-chrome wire. The culprit
is corrosion on the brass plated steel parts used in the rheostat.
You can see the brass 'R' contact folds down to wipe the
Rheostat loops.
 #11
#11
The two 'dimples' in the porcelain control your Dome
Light. When the handle is twisted all the way
clockwise, these dimples push on two wafers on the bottom which are the Dome
Light contacts.
 #12
#12
Looking
at the long fuse holder... It is fed from the "B" threaded post and
feeds the rest of the headlight switch. The small fuse has two
orange/yellow wires; one
side coming from the Key Sw., the other wire feeds the Flasher Unit.
 #13
#13
 #14
#14
This is the contacts terminals that control
the Dome Light.
 #15
#15
 #16
#16
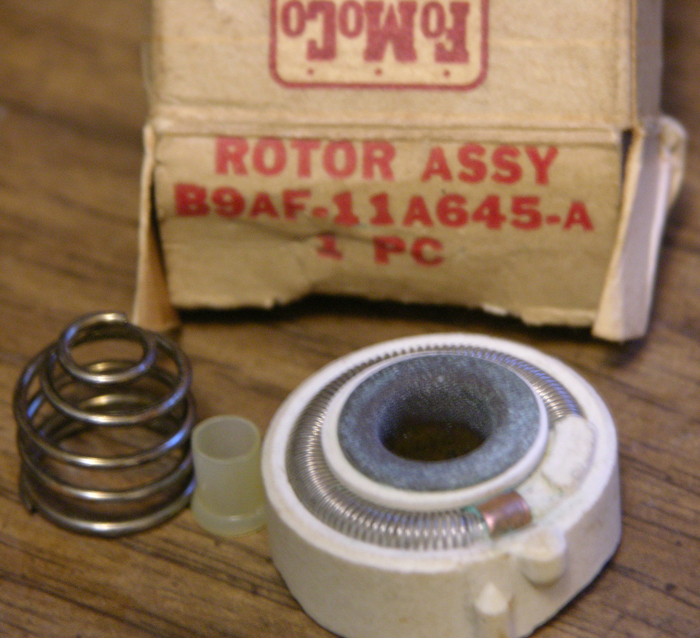
Here's a brand new Rheostat Kit, straight off the shelf
from the Parts Dept at Ford. I couldn't
believe the center portion was metal! I had no idea the Ni-Chrome wire
was
connected to it.
The connection is internal.
 #17
#17
I scraped the green patina off the brass sleeve with a
knife. Later, I did the center metal.
Then I did the one in my car. It was exactly in the same condition.
Now, my dash lights dim
properly and the new Rheostat remains in the box.
*** DIMMER BYPASS INSTRUCTIONS***
Some folks couldn't be bothered with dimming dash lights, mostly because the dash needs as much light as possible and Ford wasn't very liberal in the number of dash lights. You can add a jumper between the "I" and "R" terminals. Then, your dash lights will shine at full brilliance as soon as you pull the Headlight Switch out to either detent.
***USE CAUTION WHEN REMOVING THE KNOB STICK*** This is important! Two of our members reported, their switch broke when trying to return the knob stick upon re-assembly.
The Knob Stick should ONLY be inserted or removed when pushed all the way IN, then the RELEASE BUTTON is pressed.
 #18
#18
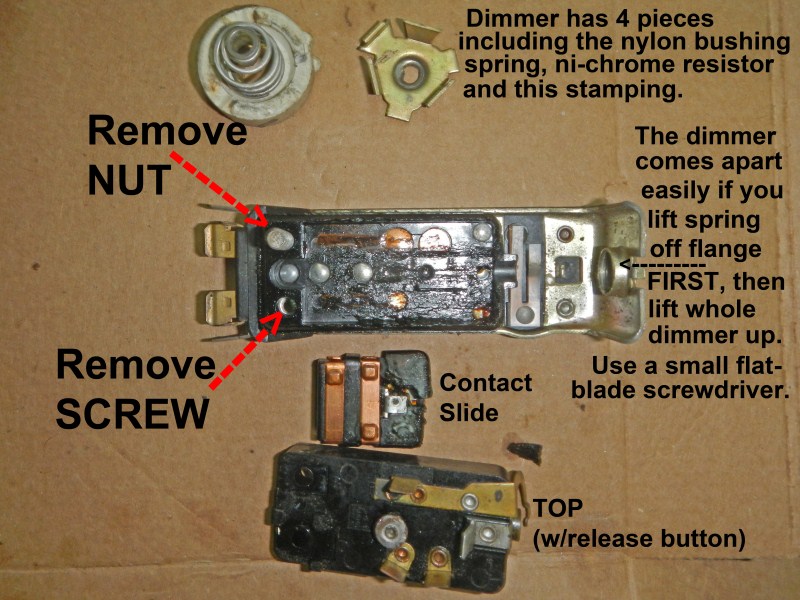
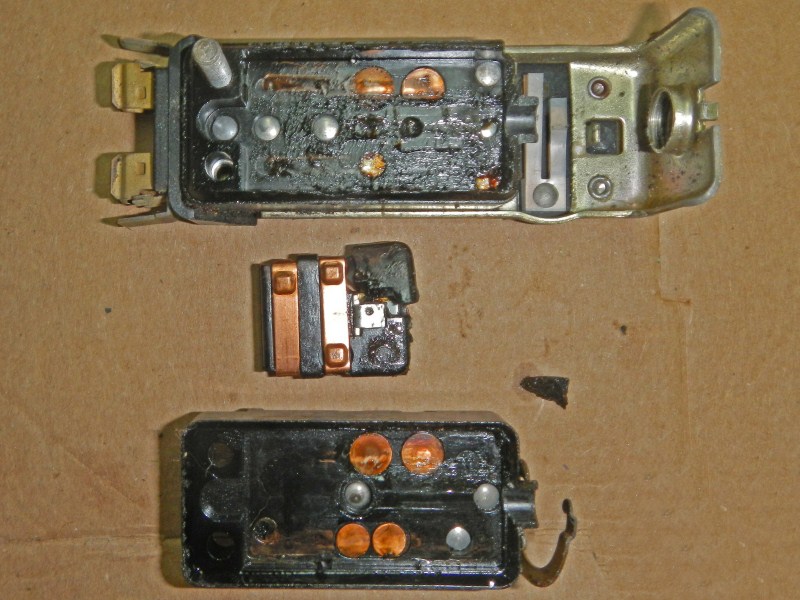
This switch practically falls
apart after removing one screw and one nut. No rivets hold it
together. Inside, the Slide is well greased on both sides and there
are no springs to jump out. This switch is very well made with
heavy duty contacts BUT it can be destroyed. Pay close attention to
the following:
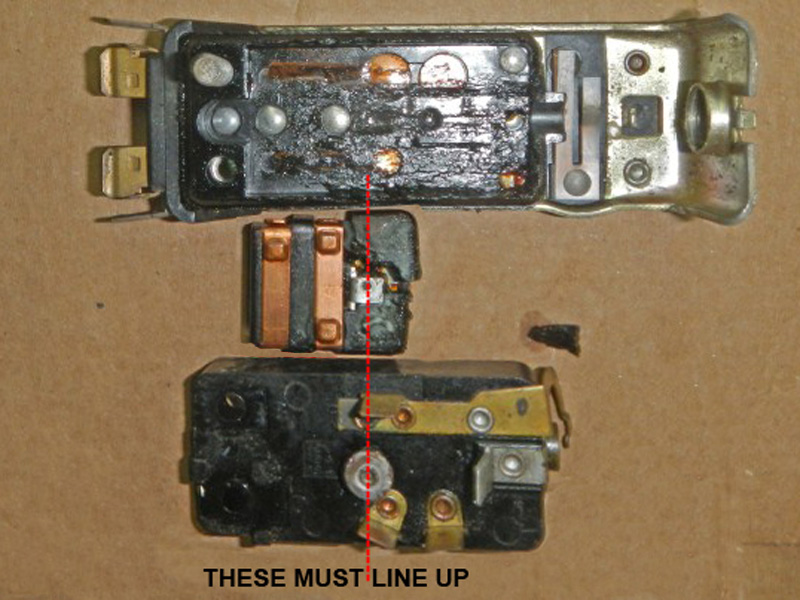
In the following picture, I aligned the three main parts to show how the Contact Slide fits into the bottom and exactly where the "Release Button" is situated. Notice that if the Slide is forward (towards the right), the Release Button will not line-up, in fact it will hit one of the slide contacts and interfere with proper alignment.
So regardless of the slide position, when the stick is
inserted all the way, it pushes the slide all the way back. ONLY THEN push, the Release Button.
In any other position, pushing the Release Button cannot release the stick.
The button you push is mounted to the housing but the Handle Lock Release is
mounted in the slide.
 #19
#19
 #20
#20
I'm showing the top piece upside down to show the internal contacts (they look brand
new). It's a shame and unnecessary that this switch is broken.
Clearly, the guy didn't know what he was doing when he pushed the button,
muscled the stick, and broke the internals.
 #21
#21
The excessive force not only broke the plastic but it bent the steel Handle
Lock.