Windshield Wiper Motor Replacement
The vacuum wiper motors on the 1958 to 1960 Thunderbirds were an anachronism in their own time, since electric wiper motors were introduced as an option on the full size Fords in 1959. The motors tend to very reliable. Most of them last for decades. Over time, some of the valves has seals dry out and warp in the motor and the motor ceases to function. Replacement is not too difficult. The biggest problem is remembering how the cables are replaced, but this instruction sheet should help you avoid that difficulty. The motors are difficult to find in new condition, but you can get yours rebuilt by sending it to Ficken Wiper Service . They have all the old Trico wiper motor parts necessary for rebuilding it to like new condition.
To remove the old motor:
-
Remove the the passenger side vinyl kickpad by unscrewing the two screws and then pulling it out.
-
Remove the passenger side metal trim panel that is located under the glove box and wraps around to the right side above the kick panel that was removed in the above step. Remove the two screws that were revealed by removing the kick panel. Remove the two screws holding the trim panel to the center console. Remove the bolt under the dash to the right of the glove box holding the the trim panel. Remove the trim panel.
-
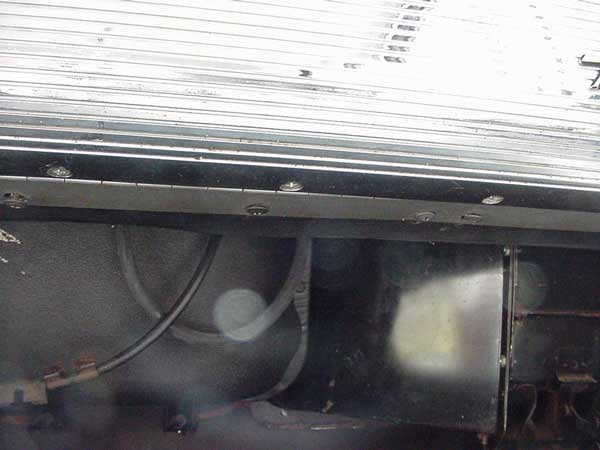
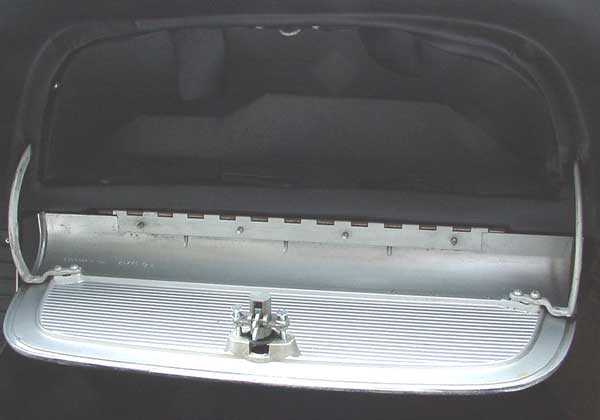
Remove the glove box door by unscrewing the screws underneath
and the four bolts holding the two hinges. Support the glove box while
removing the hinge bolts.
-
Remove the small support under the glove box that attached from the metal trim panel that was removed.
-
Remove the screws along the inner edge of the cardboard glove box . Remove the glove box by pushing it in and down and then removing it from below. If you try to remove it by pulling it through the glovebox opening, you will damage it. Reproduction gloveboxes are available at nominal cost, about $15.
-
Remove the right defroster duct by unscrewing the two screws holding it to the dash. the leftmost screw is bear to access, but if you don't remove the defroster duct, you risk breaking it as it is made only of cardboard.
-
Loosen but do not remove the center bolt of the motor drive pulley using a 7/16 inch wrench.
-
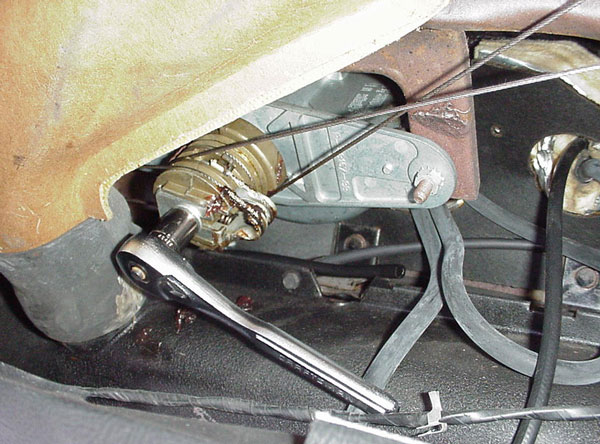
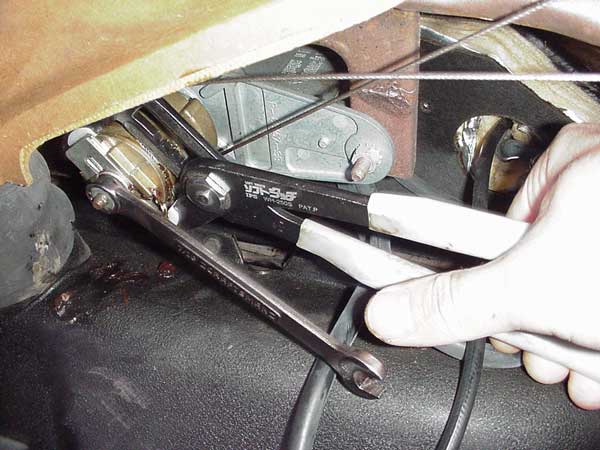
Compress the tension arms of the motor drive pulley by using a channel lock type of pliers as shown below. The picture shows channel locks compressing the tension arms from the side. Around the drum, when I did this it actually bent the little retaining tabs that hold the cables in place making it next to impossible to get the cables off until I realized my mistake. By compressing from the front with a 7/16 ratcheting box end wrench on the bolt I could compress the tension arms and tighten the bolt holding them in place. No permanent harm done and I was able to straighten the tabs with needle nose pliers. Use channel locks from the front as it works easier and doesn't damage any of the cabling. When the tension arms are compressed, retighten the center bolt of the motor drive pulley.
-
Remove the cables.
-
Unbolt the motor by removing the two 7/16 inch nuts attaching it to the dash on the front. The left nut is difficult to access.
-
Unscrew the wiper control cable by removing the single bolt that attaches on the back side of the motor . Slide out the end of the control cable by moving it perpendicular to its length. Do not force it. It will come out easily. Remove the vacuum hose emanating from the engine from the vacuum motor. Remove the vacuum hose from the windshield washer vacuum module if your car has windshield washers.
-
Remove the Windshield wiper motor.
-
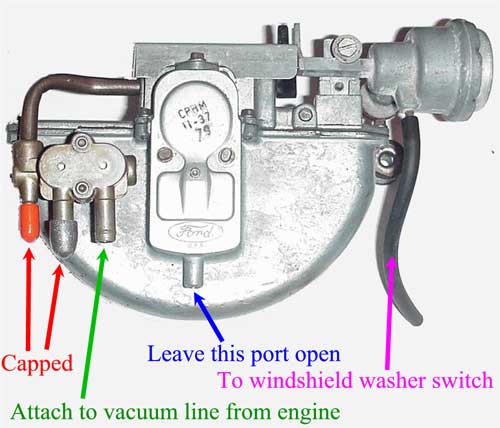
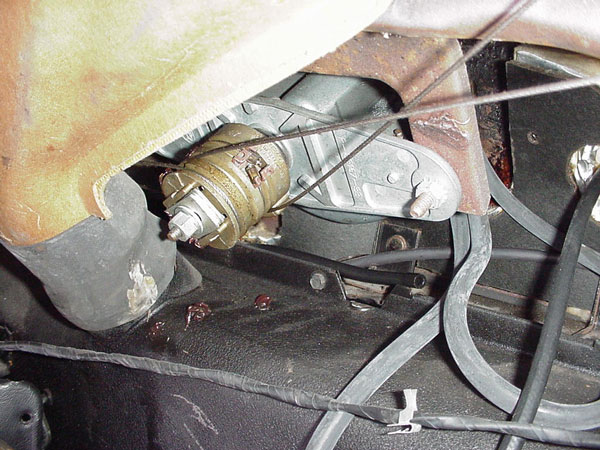
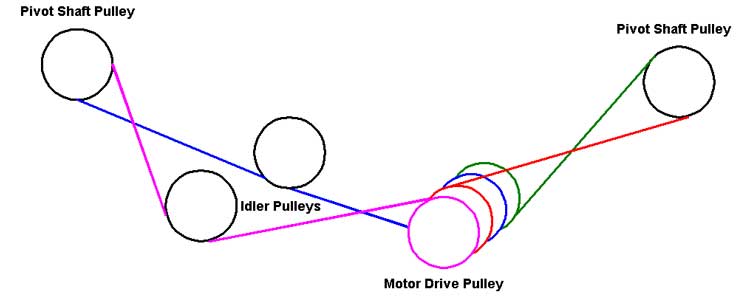
Reinstall the wiper motor by reversing the above steps. Remember only one of the ports on the motor attaches (third from the outer) to the engine vacuum hose (see diagram at bottom of page). The outer two ports are capped. The picture and diagram below should help you on determining on which grooves the cables reattach. To test if the cables are attached correctly, move one of the wiper arms by hand. The arms should move in the usual fashion, away from each other then towards each other.
Wiper Motor Ports:
