![]()
Sun Ray Appliqué Attachment - The Better Way
As the years go by, our once common wheel covers are becoming increasingly scarce and expensive. I know I have lost many wheel covers on my '59 Thunderbird. They fall off at the most inopportune moments. One summer, one of my wheels covers came off while I was going around a bend in the road. The cover cut 50 feet into a cornfield, acting more like a circular saw than a decorative device that hides the lug nuts. Luckily, I recovered that wheel cover after search for it with all the friends in my car. Many other times I have not been so lucky.
Another problem the wheel covers have is that they rotate on the wheels, especially the left front cover. This may result in inconvenience - the valve stem gets hidden behind the cover. Sometimes it can lead to disaster - the valve stem gets cut!
I have invented a solution for this problem using the Sun Ray wheel centers appliqués that were offered for 1959-60 that does not significantly alter the stock appearance of the cover. These Sun Ray wheel centers are offered in reproduction form by many Thunderbird vendors. This solution can be adapted for other cars that have a centerpiece or spinner on top of a wheel cover.
I used the McGard (Orchard Park, NY (800) 444-5847) wheel locks to lock the cover to the wheel. This device consists of a special wheel lug with a threaded center and a special flat head bolt that requires a supplied unique wrench to turn it. The correct part to get is for the 1/2-20 inch size wheel stud and 13/16 inch hex wrench. The installation requires the drilling of a 3/8-inch hole in the wheel cover. This hole and the bolt will be completely hidden by the Sun Ray wheel center in the final installation. The wheel cover is held securely to the wheel by the special bolt that threads into the special wheel lock. Since the lug nut is off center, the wheel cover will never again rotate on the wheel. The McGard wheel cover lock kit comes with installation instruction and a threaded spike which allows you to mark the exact spot for the hole that needs to be placed in the wheel cover. This is done by simply by threading the spike into the wheel lug and then mounting the wheel cover in the usual fashion. It is better to mark all wheel covers on the same wheel at once so that all covers will have the hole in the same place in relationship to the valve stem hole. This will prevent you from wasting time trying to match up each wheel cover with its specific wheel.
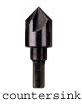
In this installation, the Sun Ray center is slightly modified so that it can be attached from the front of the cover instead of the rear. The three blind holes on the back of the Sun Ray center are drilled out to the front using a 5/32 inch drill bit as shown above.. The top of each of these holes are then cambered out to 5/16 inch using a countersink drill bit. This is done so that the 6-32 flat head bolt will have its head countersunk in the Sun Ray center. I would not camber out the hole with a 5/16-inch drill bit, as the cutting edge of the bit can grab and possibly split the center. It is far better to use a special countersink drill shown above that is sold at hardware stores. Drill only so far so that the top of the bolt will be flush with the surface of the Sun Ray.
To securely attach the center cap to the wheel cover, I used the Eastwood Nutter Thread Setter kit (part #28083) sold by Eastwood (Malverne, PA (800) 345-1178). (Webmaster note: This item may no longer be available as the link to it no longer works. Call Eastwood to see if they still sell it) This allows you to set rivets with internal threads blindly into sheet metal. Once you have this tool, you will wonder how you lived without it. I also used it to put in the threads in the reproduction floorboard of the T-Bird for the gas pedal hold down bolts, and to repair the mounting for the adjustable hood bumpers. For this project, I used steel 6-32 inserts (part #28002A). You could just drill and tap appropriate size holes in the wheel cover to attaché the 6-32 bolts, but sheet metal is thin, so there would be few threads for the bolts to grip. The Thread Setter inserts give you many more threads, making the installation much more secure.
It is hard to precisely center the Sun Ray center on the wheel cover, since both are round pieces with no definitive landmarks. The method I used to center the Sun Ray uses a pen and a wooden clothespin as shown above. Simply attach the clothespin to the pen. Hold the clothespin tangent and perpendicular to the edge of the wheel cover so that the tip of the pen touches the Sun Ray center. Adjust the position of the clothespin on the pen so that when the clothespin/pen combination is revolved around the circumference of the of the wheel cover, the pen tip is always just barely touching the circumference of the Sun Ray. Now you have the Sun Ray perfectly centered in the wheel cover.
Next, mark the wheel cover through the holes in the Sun Ray using a thin centerpunch. Use a #2 size drill bit to make the holes in the wheel cover. You need a sharp carbide tip drill bit to make the holes, because the wheel cover is stainless steel which is much harder than regular steel. Remember, when Allegheny made the stainless steel '60 Thunderbirds, they wiped out the dies that made nearly 100,000 regular steel Thunderbirds just by stamping out body panels for two stainless steel cars. Ordinary drill bits will have difficulty cutting stainless steel, and will tend to drift. Even a slight degree of drift will cause the holes to misaligned enough to prevent you from properly attaching the cover.
You cannot undrill a hole. To make sure each hole is properly aligned, I used the following procedure. After marking the placement of the holes on the wheel cover, drill the first hole. Insert the 6-32 thread insert using the special Thread Setter tool. Place the Sun Ray on the wheel and attach it using the 6-32 bolt. Visually check that the other centerpunch marks on the wheel cover are centered in the remaining holes of the Sun Ray. If they are, you are in luck and can continue. If not, you need to check that the Sun Ray is properly centered on the wheel cover using the clothespin/pen tool. If it is centered, you need to remark with the centerpunch the position of the holes remaining to be drilled. If you made a mistake, and the holes are not where you want them to be, don't despair. You can rotate the Sun Ray center on the wheel 60 degrees and mark new placements for the holes. All the holes you drilled will be covered by the Sun Ray in the final installation.
When all the holes are drilled, and the thread inserts are placed the units can be mounted to your wheels. Mount the wheel covers to the wheels in the usual fashion. Thread in the special McGard bolt into the threaded lug nut. Secure the Sun Ray center with the plastic insert to the modified wheel cover using the 6-32 flat head bolts. If you use Allen socket flat head 6-32 bolts you will also have theft deterrent for your wheel covers.
Now you can enjoy driving without worrying if you wheel covers will fall off.

Thelma and Louise, professional Thunderbird endurance testers, field testing the Sun Ray wheel cover attaching system on a 1959 Thunderbird.
Alexander Sosiak