![]()
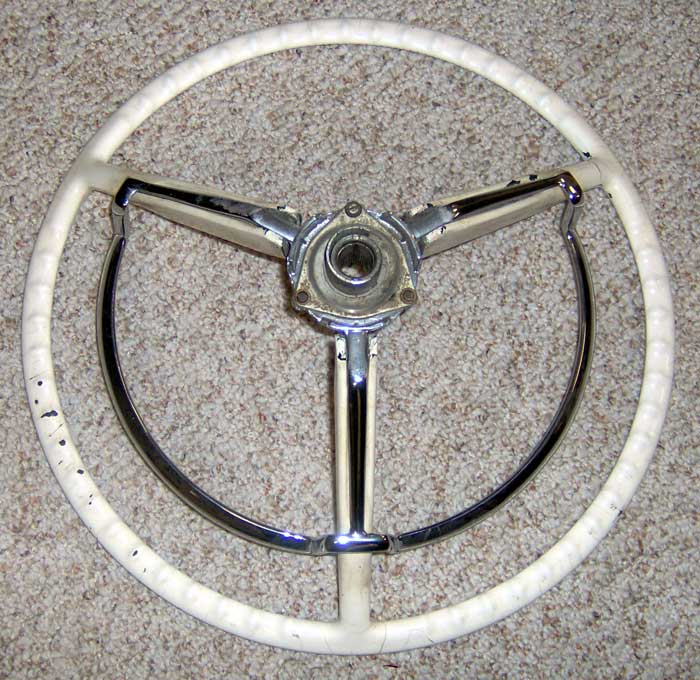
1958-1959-1960 Thunderbird Steering Wheel Disassembly and Repair
A lot of people have problems with the horn with their 1958-60 Thunderbird. It works intermittently or not at all. If the problem is not the horn relay on the left fender in the engine compartment or the horns themselves, the problem is usually in the steering wheel.
Note the circular discoloration of the triangular contact plate in the center of the steering wheel. What often happens is that there is loss of contact between the contact plate and the brass horn button in the steering wheel, because the steering column has slipped down. If you follow the steering wheel column down under the dash you will find two large round head Phillips head screws(#3 size Phillips screwdriver) holding the column to the dash. Loosen, but do not remove these screws. Move the steering column up until you feel the column contact the steering wheel contact plate. Re tighten the screws.
One other problem is that horn ring is cracked into several pieces under the contact plate. New horn rings are available in reproduction.
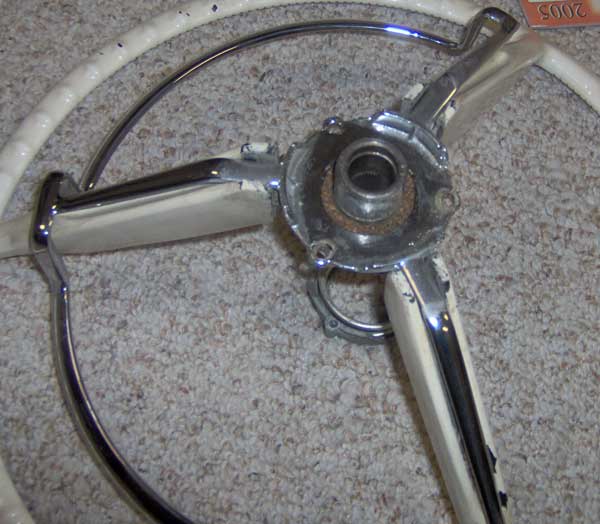
Note the position of the "C" shaped ring on the middle of the steering wheel. When disassembling the steering wheel, note it's location as it needs to reinstalled in the position shown. Many Thunderbirds have a problem that the turn signal does not cancel. The problem is due to a groove that gets cut into the "C" ring with rounds out the edge of the ring preventing the canceling from taking place. They do not reproduce this piece, but there is a solution that is for free. Just note where the groove is. There should be only one, unless someone in the past has done this fix. Simply reinstall the "C" shaped ring in the proper orientation but with smooth metal where the groove previously was. You turn signals will now cancel.

Next remove the E-Clip with snap ring pliers. Note the shiny circular area where the horn button makes contact with the contact plate.
Unscrew the three screws after removing the E-Clip. Unscrew each one even with the others. Do not just remove one screw at a time, as the opposite part of the assembly is held under spring tension.
The horn ring here is in one piece. This is rather unusual. Many times the horn ring is cracked under the contact plate. Note the partially visible cork gasket under the horn ring.
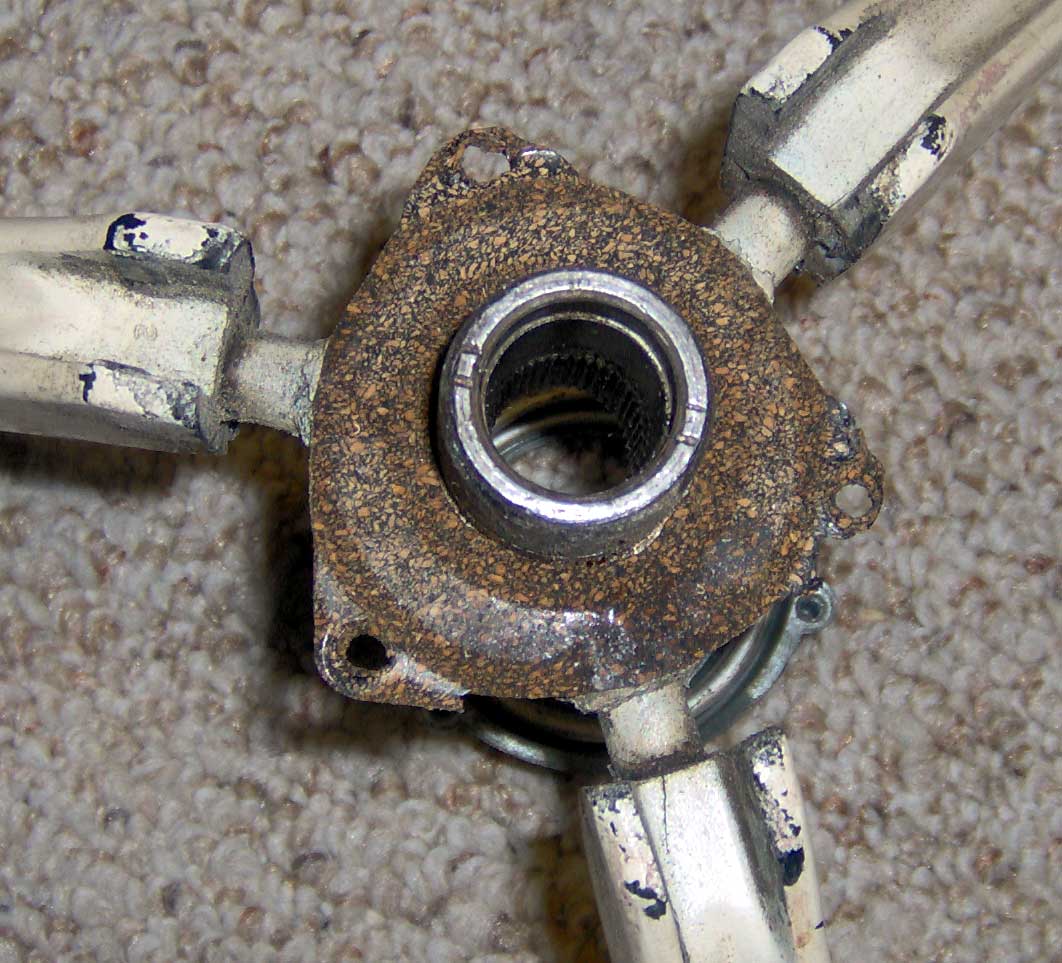
This is the cork gasket under the horn ring that is usually disintegrated. You cannot buy this gasket and your horn will not work properly without it. It will sound all on its own. The gasket is easy to make. Just buy some thin rubber-cork gasket material from the local auto supply store. Your contact plate is your template for this gasket. Just cut it out in the proper shape and punch three holes for the screws in the proper locations.
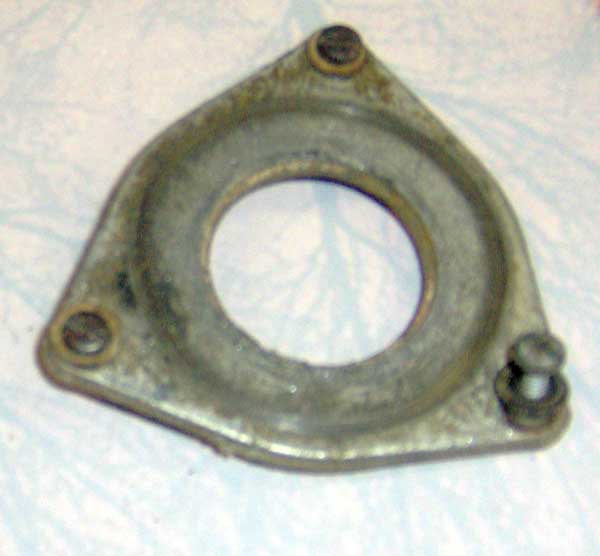
This is the contact plate. Note the three screws and their washers. If you use metal washers your horn will sound when you do not want to. You need to make sure these are insulating washers made out of plastic or paper-board.
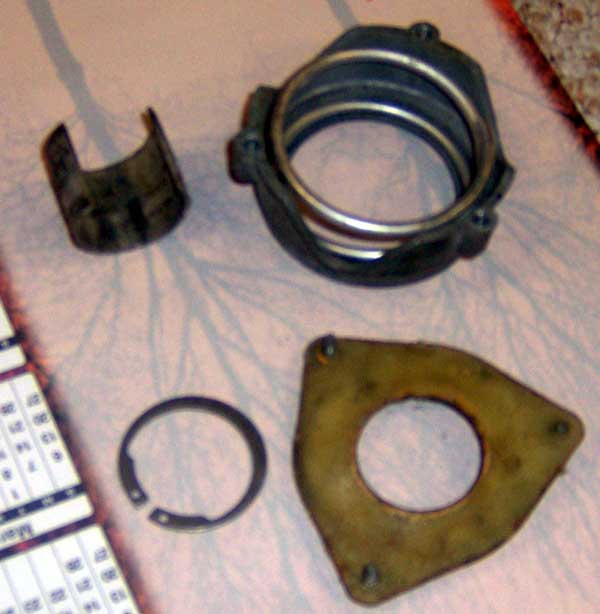
These are the small steering wheel parts that you have disassembled. Note the yellow insulator under the contact plate. Make sure this is intact. Remember. This is not the only insulator in the assembly. The others also need to be intact.
Reassemble in the opposite order.
Alexander Sosiak
Copyright Squarebirds.org 2007