

 Tweet
Tweet
Any time engine castings are altered or a new cam is installed, piston-to-valve clearance MUST be measured.
This isn't something that can be estimated. Either there is or isn't enough clearance. So, how do we measure...
Preliminary... We need the head gaskets and heads installed and torqued to spec's. The timing chain needs to be installed and set properly.
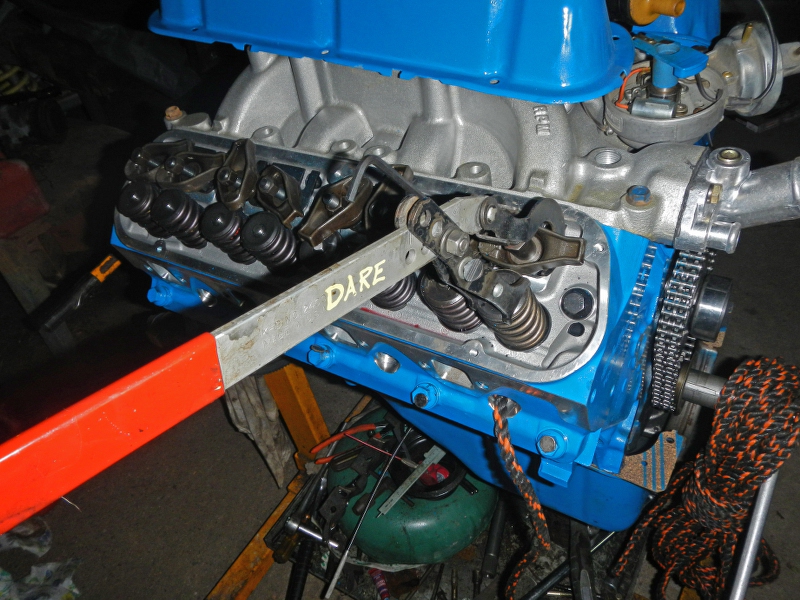
I remove two valve springs (usually both on #1 cylinder) then tie the valve stems with a wire so they cannot drop into the cylinder. There are a few ways to pull the springs off, one uses compressed air in the spark plug hole. Another favorite is Scumdog's method of using a rope. This is the method I used this time. Simply feed a few feet of rope into the spark plug hole and hand crank the piston to the top so the rope jams the valves shut:
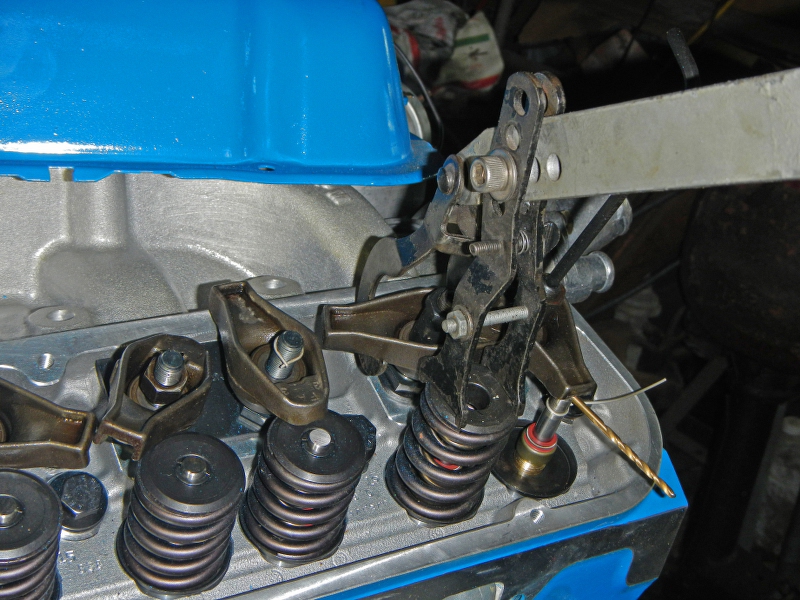
I have a few different styles of valve spring compressors, this one wraps around the rocker arm (or rocker arm shaft).
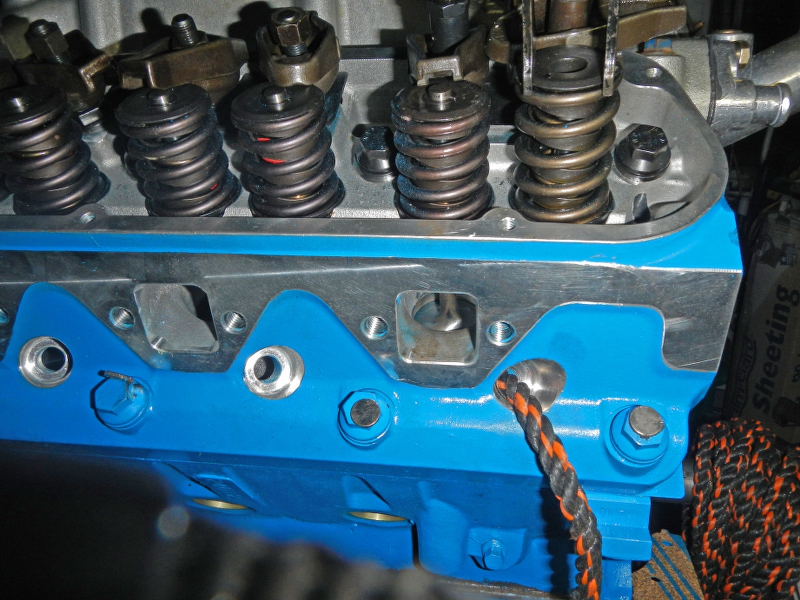
With a push downward the valve stays still while the spring compresses, revealing the valve keepers. Once they are out of the way the spring is free to remove.
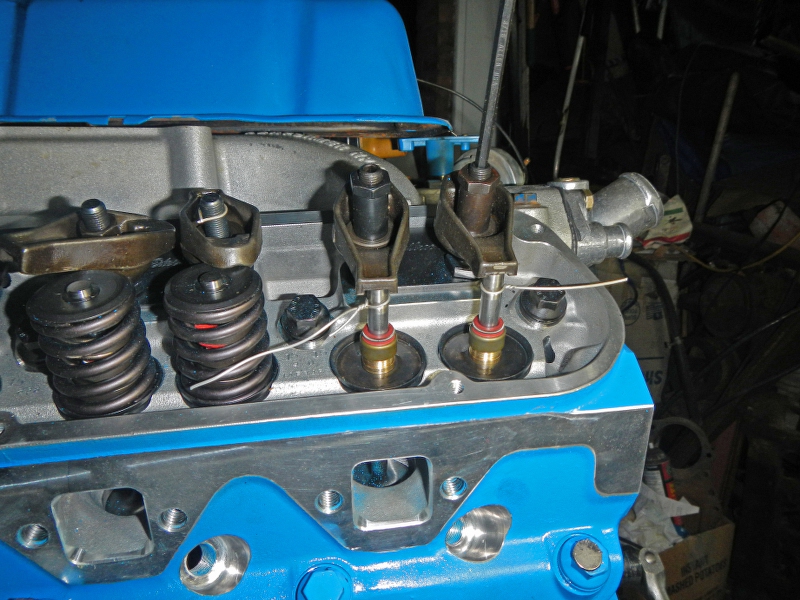
Before moving the crankshaft, I tie the stems up with a wire so they don't fall down into the cylinder. Then, I remove the rope, install two pushrods just past the lifter preload, and I set the rocker arm nuts so they don't move.
Here comes the 'nitty-gritty'... I lower a valve and carefully rotate the crankshaft as I feel the valve. Eventually the piston will touch the valve. There comes a point where the cam reaches maximum lift as the piston comes close to the valve. At the closest point in this rotation, stop and measure between the rocker arm and the valve stem.
The intake valves are always much larger than exhaust valves so they tend to come closest to the piston, depending on timing chain settings and offsets.
Racers run engines at top rpms most of the time while street engines tend to run at lower rpms most of the time. For that reason, race engines normally retard the cam timing while street applications are set a zero or they advance the cam timing for more torque at low end. Yet, another reason for this important measurement.
This engine is a 351Windsor I am building for Brian Wheeler and his 1970 LTD named, Brown Sugar.
Most specifications require at least fifty thousandths (0.050") valve clearance. This engine is low compression (9.2:1) with dished pistons so it produces a much wider clearance. I measured .125" and I stuck a 1/8" drill bit between the stem and rocker arm just to show.
The exhaust valve never came close to the piston so it's time to re-assemble the springs.
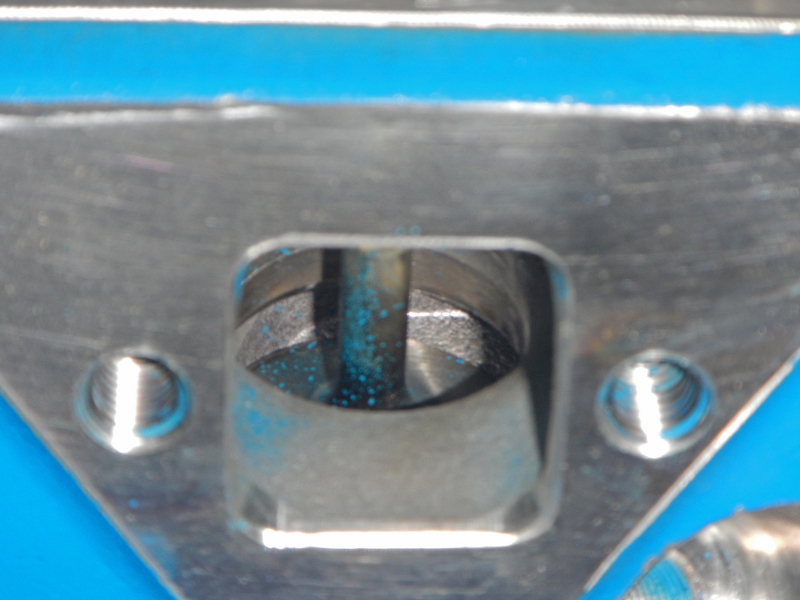
Not a great picture but here's a sneak peek through the exhaust port. If you get past the blue overspray, it shows the open valve and top of the piston:
I'm nearly done with this build:
This isn't something that can be estimated. Either there is or isn't enough clearance. So, how do we measure...
Preliminary... We need the head gaskets and heads installed and torqued to spec's. The timing chain needs to be installed and set properly.
I remove two valve springs (usually both on #1 cylinder) then tie the valve stems with a wire so they cannot drop into the cylinder. There are a few ways to pull the springs off, one uses compressed air in the spark plug hole. Another favorite is Scumdog's method of using a rope. This is the method I used this time. Simply feed a few feet of rope into the spark plug hole and hand crank the piston to the top so the rope jams the valves shut:
I have a few different styles of valve spring compressors, this one wraps around the rocker arm (or rocker arm shaft).
With a push downward the valve stays still while the spring compresses, revealing the valve keepers. Once they are out of the way the spring is free to remove.
Before moving the crankshaft, I tie the stems up with a wire so they don't fall down into the cylinder. Then, I remove the rope, install two pushrods just past the lifter preload, and I set the rocker arm nuts so they don't move.
Here comes the 'nitty-gritty'... I lower a valve and carefully rotate the crankshaft as I feel the valve. Eventually the piston will touch the valve. There comes a point where the cam reaches maximum lift as the piston comes close to the valve. At the closest point in this rotation, stop and measure between the rocker arm and the valve stem.
The intake valves are always much larger than exhaust valves so they tend to come closest to the piston, depending on timing chain settings and offsets.
Racers run engines at top rpms most of the time while street engines tend to run at lower rpms most of the time. For that reason, race engines normally retard the cam timing while street applications are set a zero or they advance the cam timing for more torque at low end. Yet, another reason for this important measurement.
This engine is a 351Windsor I am building for Brian Wheeler and his 1970 LTD named, Brown Sugar.
Most specifications require at least fifty thousandths (0.050") valve clearance. This engine is low compression (9.2:1) with dished pistons so it produces a much wider clearance. I measured .125" and I stuck a 1/8" drill bit between the stem and rocker arm just to show.
The exhaust valve never came close to the piston so it's time to re-assemble the springs.
Not a great picture but here's a sneak peek through the exhaust port. If you get past the blue overspray, it shows the open valve and top of the piston:
I'm nearly done with this build:
- 351W, bored .030" over,
- crankshaft grind is .010"/.010" just to clean up the rod pins and mains. Then it was balanced with the flex plate and harmonic balancer in place resulting in a beautiful and accurate balance for smooth operation across the rpm range.
- Edelbrock 'Performer RPM' aluminum heads including all the goodies.
- Edelbrock 'Performer RPM' aluminum intake manifold.
- Edelbrock 1406, 600-CFM carb.
- Comp Cams hydraulic roller cam w/lifters #35413-8 (a well-behaved cam for the street)
- Hypereutectic alloy pistons (9.2:1 CR)
- Hastings moly rings
- Clevite 77 bearings (cam, rod and main)
- Melling M-83 'standard' oil pump with IS-83 intermediate driveshaft (not 1/4")
- Comp Cams 'Magnum' double roller steel sprocket timing set
- Brass freeze plugs

Comment