Announcement

Collapse
No announcement yet.

Holiday flush

Collapse
X
 
  • Time
  • Show
Clear All
new posts
  • del
    Retired Expert Enthusiast
    • May 11 2010
    • 312

    #16
    Thanks for the pep talk Dave! Lots of info there to digest, and I'm still gonna be stressing until I get that sucker out. I have a propane torch that works OK for soldering but I think I need a different tip to concentrate the flame to get that stub red hot. I have no idea how I would rig up a drill guide the way you describe...sounds like a good idea though. Would that use some sort of off-the-shelf contraption with some "customization"? Do you have any pictures?

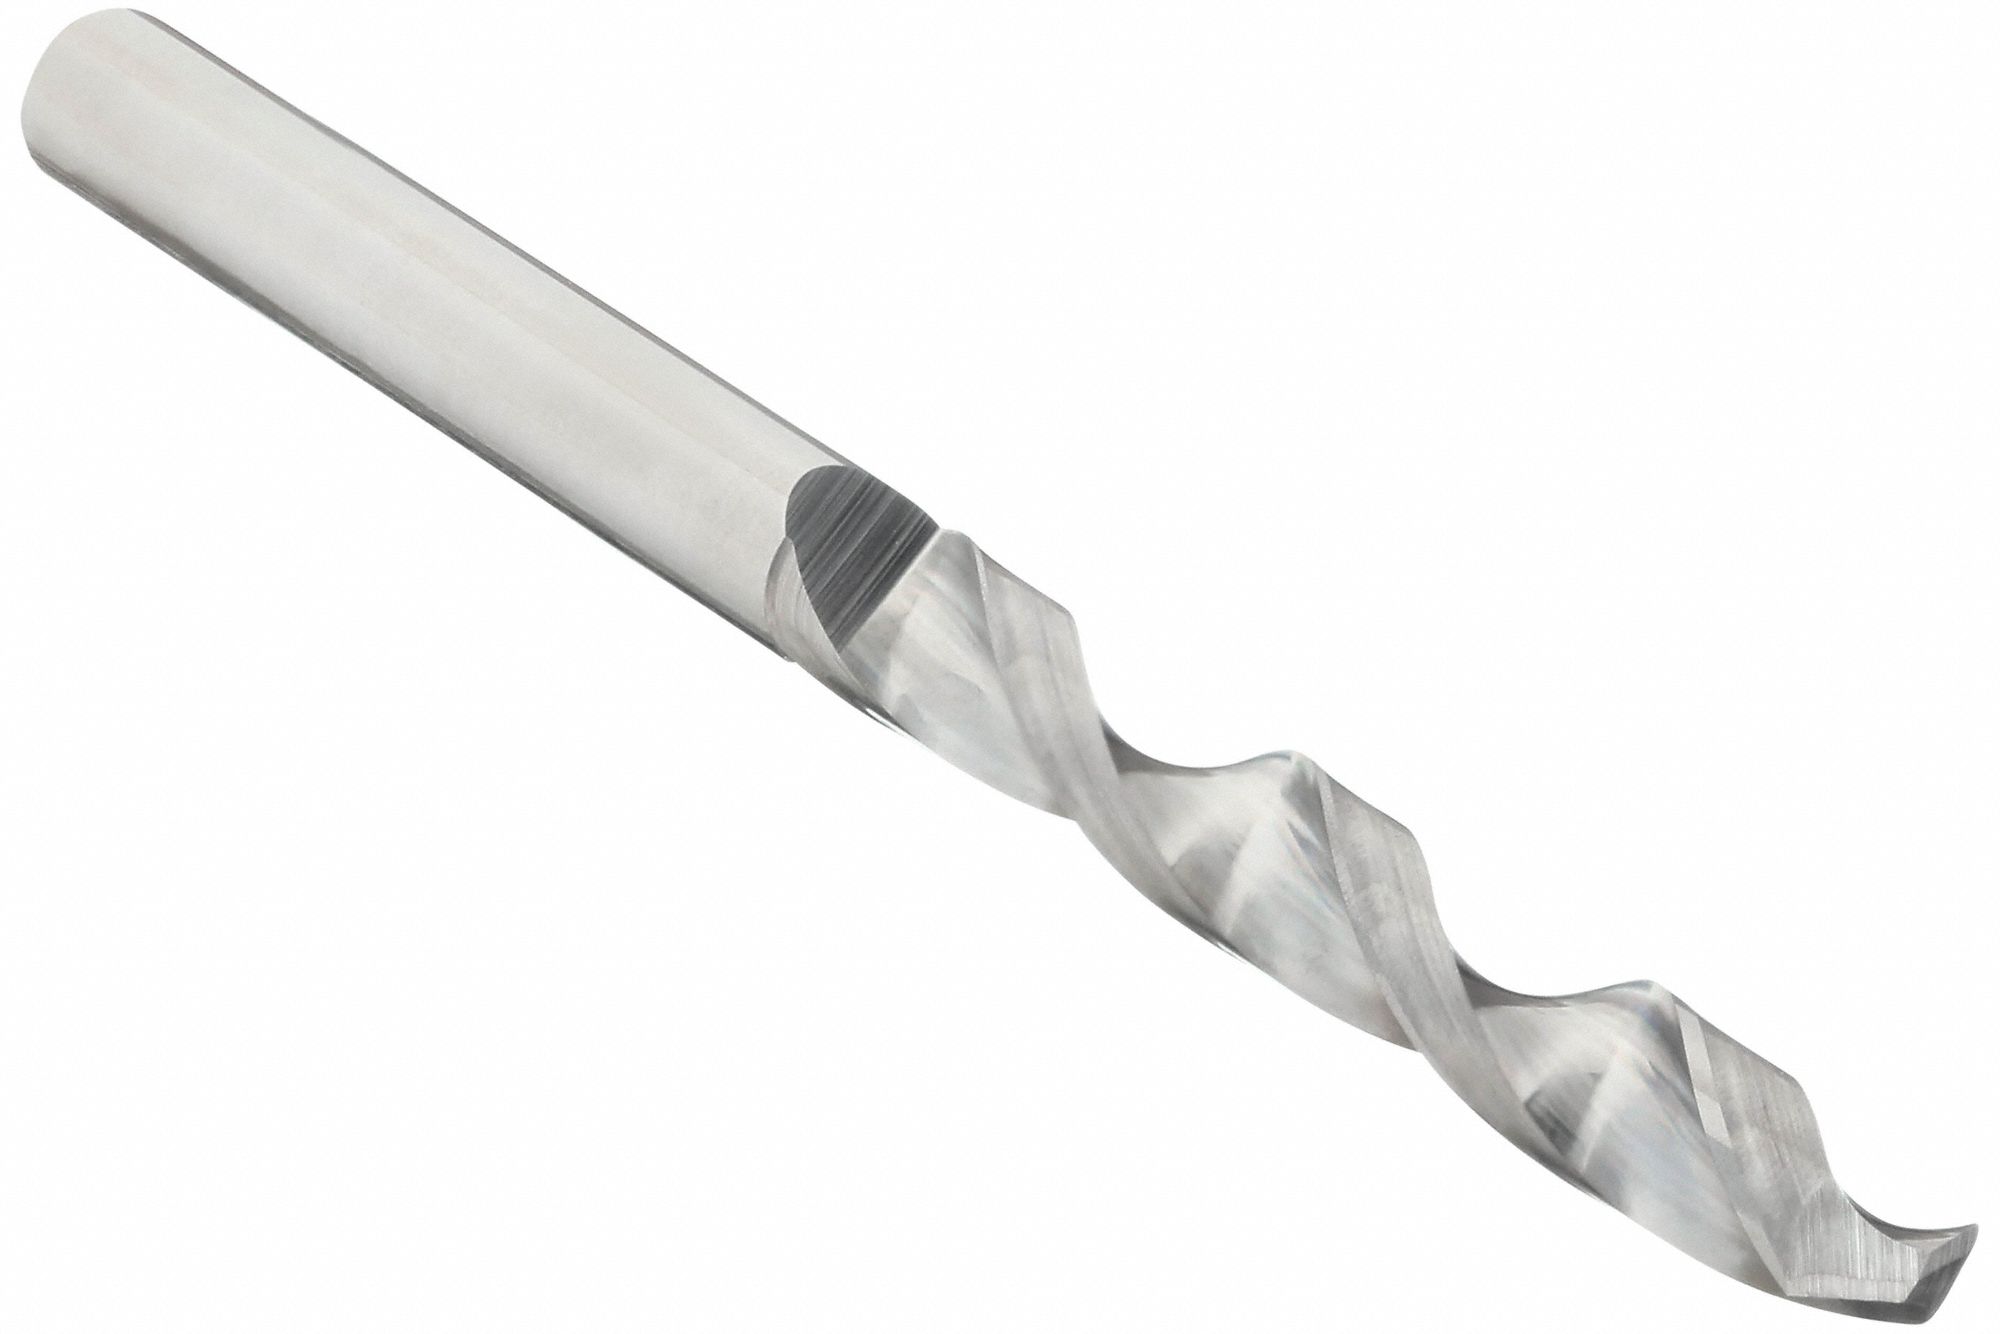
    The larger drill bit I have says BRUTE 5/32 HS USA which seems pretty garden-variety, assuming HS and HSS are equivalent? I did some research and need to do more, but is this what I need?

    On a positive note the radiator is back from the shop and looking like new, and here's what a newly re-chromed bumper looks like after the bumper guard divots are filled in.
    Attached Files
    Regards,
    Don Vincent
    Amherst NY
    1960 HT 352
    TBird Registry 34042

    Comment

    • simplyconnected
      Administrator
      • May 26 2009
      • 8787

      #17
      HS = High Speed
      HSS = High Speed Steel

      You're going to need carbide steel to get through carbon steel. It helps to anneal carbon steel first, if you can.

      I would not worry about using a smaller tip but I would use MAP gas instead of propane. MAP is much hotter. Dry the area and make the broken bolt site cherry red hot. This will relieve the stress exerted by the bolt and the easy-out. I'm hoping you can feel the broken easy-out by reaching inside the thermostat hole. Do this after it cools. If this is true, you may luck out and knock out the broken piece from the back.

      DRILL GUIDE: Let's say I have a piece of 1/4" steel that is round and it fits inside the thermostat hole. Let's say I have a second piece of steel that covers the t-stat hole AND the bolt holes. Fasten both pieces together by welding or bolting, so they can't move.

      Using the expansion tank as a pattern, drill two clearance holes through this steel where the expansion tank would normally go but make the 'broken bolt hole' smaller (like 3/16"). Instead of mounting the expansion tank, I'm using this fabricated flat piece of steel with mounting holes and a protrusion to keep it 'fixed' in the hole (so it cannot slide around).

      With this piece bolted on one side, use the smaller hole to drill out the easy-out. This smaller hole will act as a drill guide for your carbide bit so it needs to be exactly where you want to drill. I hope I described this so you understand.

      A machine shop would clamp your block and use a mill to drill through the easy-out. The mill is fixed, solid. This fabricated piece of steel would do the same but for hand-drilling. In other words, it's a drill bushing. - Dave
      Member, Sons of the American Revolution

      CLICK HERE to see my custom hydraulic roller 390 FE build.

      "We've got to pause and ask ourselves: How much clean air do we need?"
      --Lee Iacocca

      From: Royal Oak, Michigan

      Comment

      • Joe Johnston
        Super-Experienced
        • Dec 23 2008
        • 720

        #18
        When this happened when I was working, we always tried a drop of silver solder on the end of a rod, and then silver soldered it to the broken end of the E Z Out. Often between the heat and now having something to grab onto, the E Z Out can be carefully wiggled free. If that didn't work it was off to the mill or EDM depending on the part.

        Comment

        • del
          Retired Expert Enthusiast
          • May 11 2010
          • 312

          #19
          Joe - I don't think I'm equipped and I'm positive I'm not experienced enough to consider the silver soldering but thanks! Wish I was.
          Dave - your explanation about the drill guide was great. Upon thinking it through like you explained, I get stuck at the point where I'm trying to line up to drill the guide holes on the flat piece covering the thermostat hole and both bolt holes. I probably am just not visualizing it yet. Even if the circular piece in the thermostat hole is like bone tight in the hole and attached to the flat piece, how can I be sure I'm lined up when I start drilling into the flat piece? I can use the exp tank mount as a guide but where is the reference to the actual holes?
          Regards,
          Don Vincent
          Amherst NY
          1960 HT 352
          TBird Registry 34042

          Comment

          • simplyconnected
            Administrator
            • May 26 2009
            • 8787

            #20
            Originally posted by del
            ... how can I be sure I'm lined up when I start drilling into the flat piece? I can use the exp tank mount as a guide but where is the reference to the actual holes?
            That's the easy part, Don. After you make the plate with the 'centering puck', stick a piece of clay or better yet, American cheese over the hole on the block. Squeeze your new plate in position, and the hole will show up on the reverse side. Be careful not to rotate it. Shove it straight in and straight out. The cheese will naturally go into the threaded block hole but leave a nice outline on your new piece.

            The other hole can be located by the expansion tank flange or another piece of cheese over the broken bolt.

            Before doing anything else I would heat the broken easy-out cherry red hot to relieve any stress, draw out hardness and to loosen, then let it slowly cool. The easy-out and possibly the broken bolt may come out easier than you think. - Dave
            Member, Sons of the American Revolution

            CLICK HERE to see my custom hydraulic roller 390 FE build.

            "We've got to pause and ask ourselves: How much clean air do we need?"
            --Lee Iacocca

            From: Royal Oak, Michigan

            Comment

            • Joe Johnston
              Super-Experienced
              • Dec 23 2008
              • 720

              #21
              I too am a very firm believer in "there is no replacement for displacement" and also "you never have too much fuel until you are on fire!" BUT "nothing sounds as good as a Y-BLOCK!" My 57 Y sounds so much sweeter than my 63 FE.

              Comment

              • Y-Blokkah
                Apprentice
                • Oct 4 2018
                • 79

                #22
                Even a garden hose running water through works ok, but the heater core directly. Pull the hoses and do it that way. Don’t blast the pressure though or you’ll wreck the core.

                Comment

                • del
                  Retired Expert Enthusiast
                  • May 11 2010
                  • 312

                  #23
                  Dave - OK I'll add American cheese to my shopping list! I did try to feel around in there for the end of the bolt or ez out and didn't detect anything.

                  Regarding carbide / carbide tip drill bit, non-masonry type, I have been trying to source locally but haven't had any luck yet. When I asked at the local industrial / contractor supply place for a carbide drill for metal, not concrete, he looked at me like I was speaking in tongues. Would this do the job? https://www.grainger.com/product/MIC...ill-Bit-16T546
                  Regards,
                  Don Vincent
                  Amherst NY
                  1960 HT 352
                  TBird Registry 34042

                  Comment

                  • simplyconnected
                    Administrator
                    • May 26 2009
                    • 8787

                    #24
                    I think I have one in 3/16". Want me to send it to you? BTW did you heat it up yet? - Dave
                    Member, Sons of the American Revolution

                    CLICK HERE to see my custom hydraulic roller 390 FE build.

                    "We've got to pause and ask ourselves: How much clean air do we need?"
                    --Lee Iacocca

                    From: Royal Oak, Michigan

                    Comment

                    • del
                      Retired Expert Enthusiast
                      • May 11 2010
                      • 312

                      #25
                      Not yet. Tomorrow I hope. Got the MAP gas today and need to give the area a good degreasing. Also got a piece of 1/4" plate and some hopefully suitable saw blades. Also got the cheese!
                      Regards,
                      Don Vincent
                      Amherst NY
                      1960 HT 352
                      TBird Registry 34042

                      Comment

                      • del
                        Retired Expert Enthusiast
                        • May 11 2010
                        • 312

                        #26
                        and yes that would be wonderful if you could send me the bit!
                        Regards,
                        Don Vincent
                        Amherst NY
                        1960 HT 352
                        TBird Registry 34042

                        Comment

                        • del
                          Retired Expert Enthusiast
                          • May 11 2010
                          • 312

                          #27
                          broken surge tank bolt update

                          Dave's carbide bit arrived safe and sound, and meanwhile...

                          I learned that I didn't have anything suitable to cut 1/4" steel plate so off to a local fabricator to get the cuts made. They indicated that the circle would be a challenge. That was 10 days ago. Today, I stop by to suggest that a square would work instead of the circle only to find out they can't get to it for at least three weeks! Next stop, NAPA machine shop. Nope, no suitable saw, but they suggest the local branch of https://www.metalsupermarkets.com/
                          These guys are great! They made all the cuts, on my piece of Home Depot steel, while I waited, and the charge was $Zero! If you need any size tube, channel, flat stock in steel, aluminum, some copper & brass, they've got it at over 80 locations. I never heard of them before today.

                          Here's what I've got so far for the drilling guide. I am still puzzled about how to ensure I get the 2nd hole in the right place. The broken bolt is flush with the surface so cheese method won't work to mark it.
                          Also just to confirm, on those surge tank mount holes, I am positive that they don't go all the way through like the water pump holes do. And, as it turns out, I didn't drill all the way through when I first attempted to prepare for the now busted EZ-out. So I'm thinking that I'll need to put a depth stopper on the bit when I get to the point.
                          One last question for now...once I start putting everything back together, should I use anything on the bolt treads? I have new bolts for everything.. well everything except the surge tank mount bolts which I guess I'll get at the hardware store since I can't seem to locate them in any of the catalogs.
                          Attached Files
                          Regards,
                          Don Vincent
                          Amherst NY
                          1960 HT 352
                          TBird Registry 34042

                          Comment

                          • sidewalkman
                            Super-Experienced
                            • Sep 14 2015
                            • 508

                            #28
                            I've never used anything on the bolts and nothing has ever seeped out. I guess if you're worried about it some Teflon tape of plumbers putty? I worry that the engine gets really hot and the stuff seeps into the motor.

                            Good luck, looks like a huge pain!
                            Scott
                            South Delta, BC, Canada
                            1960 White T-Bird, PS, PB that's it
                            Red Leather Interior!
                            www.squarebirds.org/users/sidewalkman
                            Thunderbird Registry #61266
                            http://www.squarebirds.org/picture_g...ibrary/trl.htm

                            Comment

                            • simplyconnected
                              Administrator
                              • May 26 2009
                              • 8787

                              #29
                              Originally posted by del
                              Dave's carbide bit arrived safe and sound, and meanwhile...
                              Ok, did the 5/16" tap arrive as well?
                              Originally posted by del
                              ...I am still puzzled about how to ensure I get the 2nd hole in the right place. The broken bolt is flush with the surface so cheese method won't work to mark it.
                              Get a stiff piece of shirtboard and mark 'top' on one side. Face the word 'top' toward the surge tank flange. I like to work from the bolt hole that is not damaged and make the hole small so a BOLT with a flat washer is snug. Bolt and nut the shirtboard to the flange and mark your holes. (You can help by embossing the cardboard into surrounding reliefs by pressing with a blunt tool.) You can also glue the shirtboard to the flange using rubber cement (or something that can be removed, later. Now that the cardboard is located on the flange, use a drill bit that fits snuggly IN THE FLANGE to go through and mark the cardboard. You only want a dimple in the paper; something that will show your center. Now, you have a pattern to transfer the information to your new drill guide.

                              I would use the 'emboss' as a guide in the shirtboard and cut out a hole for the square. Then, put the glued side (top) on the 'manifold side' of the drill guide and center punch the new hole in the back side of the drill guide. Drilling from the back side of your drill guide should give better accuracy for when you go in from the front because the back side sits right over the broken bolt. Go slow and steady.

                              When you make your first centerpunch, do it lightly then measure from the opposite bolt hole for accuracy. BTW, IF you separate the square from your new drill guide, spray paint it first, so you can re-locate it in the same place.

                              Originally posted by del
                              Also just to confirm, on those surge tank mount holes, I am positive that they don't go all the way through like the water pump holes do....
                              Reach inside the thermostat hole in your intake manifold with your finger or use a dentist's mirror to see the back side of the holes.

                              Grade 5 bolts can be found at Fastenal or probably a good auto parts store. My Home Depot carries them too. If you can get grade 8, better yet. They're 5/16" in diameter.
                              Member, Sons of the American Revolution

                              CLICK HERE to see my custom hydraulic roller 390 FE build.

                              "We've got to pause and ask ourselves: How much clean air do we need?"
                              --Lee Iacocca

                              From: Royal Oak, Michigan

                              Comment

                              • del
                                Retired Expert Enthusiast
                                • May 11 2010
                                • 312

                                #30
                                No tap yet. Maybe today?

                                Thanks for that detailed explanation on the pattern. I'm heading to the garage with some cardboard and will report back later

                                Here are some pics of the inside of those holes. Maybe my intake is not stock but the ends of the bolts are not visible.
                                Attached Files
                                Regards,
                                Don Vincent
                                Amherst NY
                                1960 HT 352
                                TBird Registry 34042

                                Comment

                                Working...
                                😀
                                🥰
                                🤢
                                😎
                                😡
                                👍
                                👎