Announcement

Collapse
No announcement yet.

My '66 Hardtop Town Build

Collapse
X
 
  • Time
  • Show
Clear All
new posts
  • simplyconnected
    Administrator
    • May 26 2009
    • 8787

    #16
    Window motors go bad from NON-use. I've never seen one with worn down brushes, even after fifty years of service. Or better said, fifty years of mostly sitting there doing nothing.

    Think of it, they go up a number of turns then they go down that same number. Heater motors get a better workout and I've never seen one of those wear out either. The last heater motor I worked on was simply frozen. Then I got it going without buying any parts and now it works just fine. The last window motor I worked on was simply gummed up with greasy junk that loaded the commutator and brush holders. After a good cleaning all the parts in diesel fuel it ran great.

    Any obsolete part growing older will also be more rare and more costly to replace with OEM parts. On the other hand, there are 'production' motors with two wires that can be substituted at a low cost. To retrofit one of these motors requires two additional relays, one for 'up' and the other for 'down' because Ford controlled opposite-wound field windings in OEM motors for direction. Modern motors use permanent magnets to eliminate electric fields so now we simply reverse armature current. - Dave
    Member, Sons of the American Revolution

    CLICK HERE to see my custom hydraulic roller 390 FE build.

    "We've got to pause and ask ourselves: How much clean air do we need?"
    --Lee Iacocca

    From: Royal Oak, Michigan

    Comment

    • Cwcb08
      Experienced
      • Oct 11 2016
      • 163

      #17
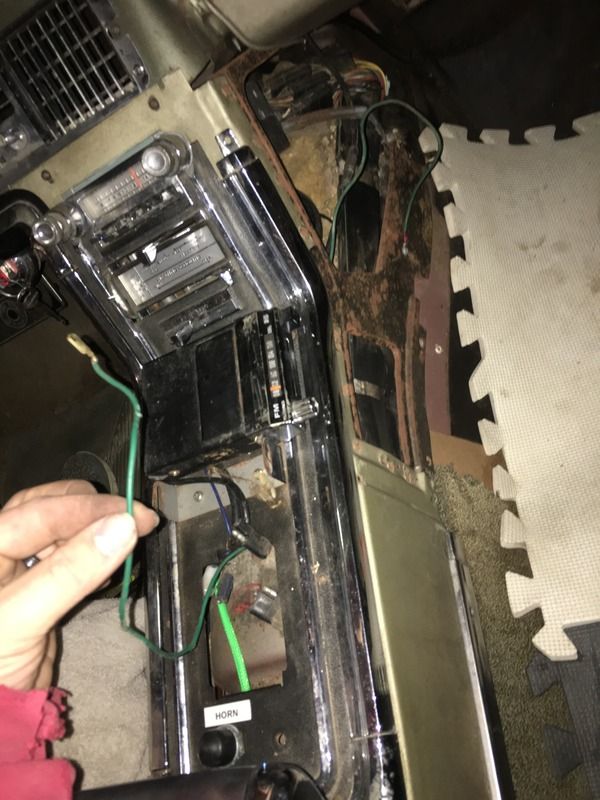
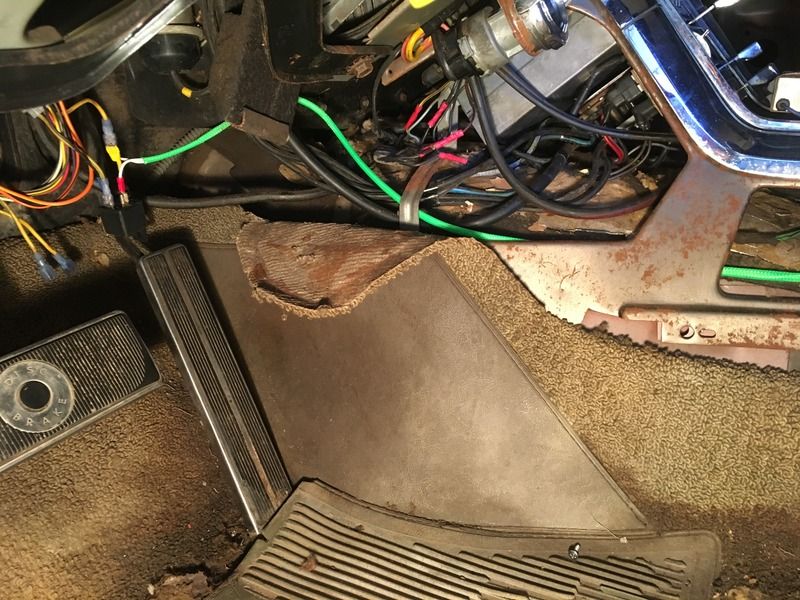
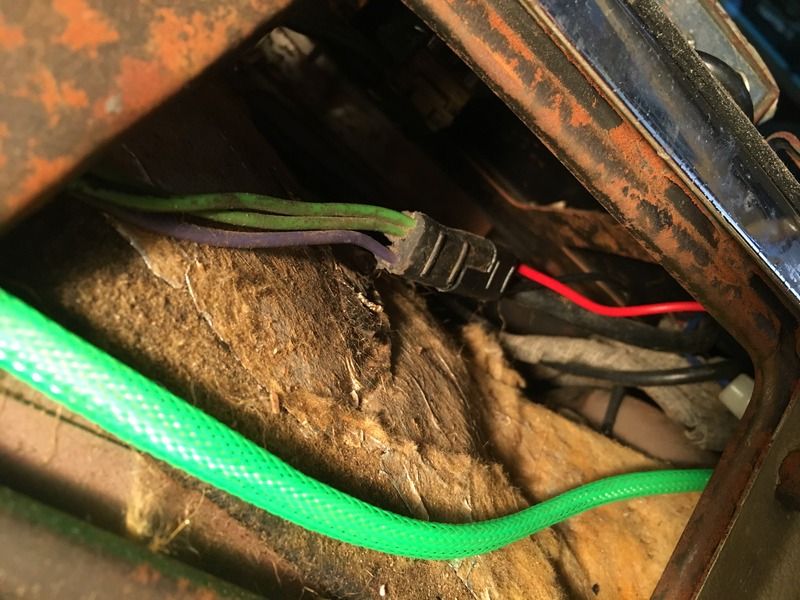
      Anyone have any idea what this wire is, looks like a ground maybe?
      Started under the Centre console cubby and terminated in the pass footwell. I couldn't identify anywhere it might have gone or came from and it doesn't look factory..


      Hooked both window motors up directly to my battery booster and they both function up and down the passenger side is much stronger ( I'll post some quick clips when they upload ) I'm sure I tried that before but I'm glad I did it again.


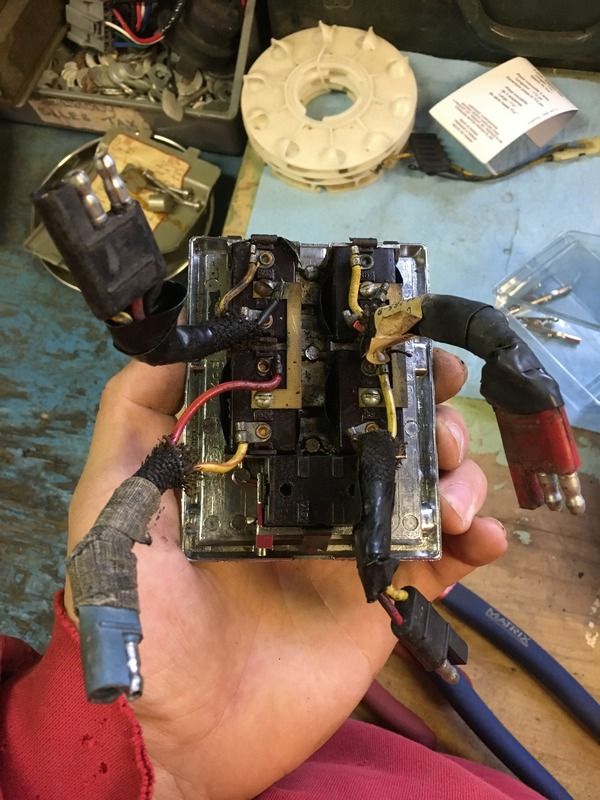
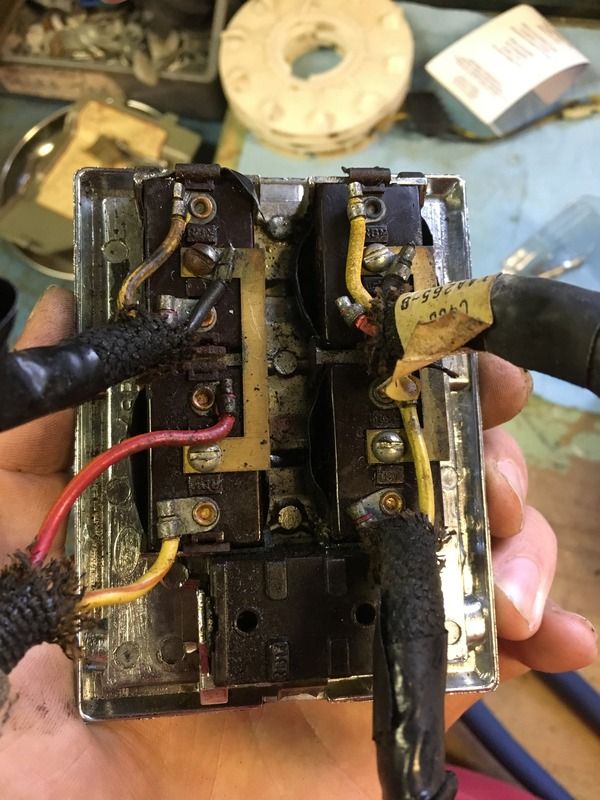
      Next issue is the switches we smelled electrical burning or at least getting hot so I'll have to try and fix or repair that


      Last edited by Cwcb08; November 20, 2016, 08:23 PM.
      2016 FORD F150 XLT 3.5 EB SPORT 302a - 2012 KAWASAKI ZX-6R - 2012 LEGEND DELUXE V-NOSE - 2008 KAWASAKI ZZR600 - 2008 FORD FOCUS SE - 2007 KAWASAKI ZX-6R - 2002 ARTIC CAT 500 - 1990 JOHN DEERE 265 - 1966 FORD THUNDERBIRD HARDTOP TOWN

      Comment

      • Cwcb08
        Experienced
        • Oct 11 2016
        • 163

        #18
        Originally posted by simplyconnected
        Window motors go bad from NON-use. I've never seen one with worn down brushes, even after fifty years of service. Or better said, fifty years of mostly sitting there doing nothing.

        Think of it, they go up a number of turns then they go down that same number. Heater motors get a better workout and I've never seen one of those wear out either. The last heater motor I worked on was simply frozen. Then I got it going without buying any parts and now it works just fine. The last window motor I worked on was simply gummed up with greasy junk that loaded the commutator and brush holders. After a good cleaning all the parts in diesel fuel it ran great.

        Any obsolete part growing older will also be more rare and more costly to replace with OEM parts. On the other hand, there are 'production' motors with two wires that can be substituted at a low cost. To retrofit one of these motors requires two additional relays, one for 'up' and the other for 'down' because Ford controlled opposite-wound field windings in OEM motors for direction. Modern motors use permanent magnets to eliminate electric fields so now we simply reverse armature current. - Dave
        Do you have an link and example of one of these motors for future reference Dave?
        2016 FORD F150 XLT 3.5 EB SPORT 302a - 2012 KAWASAKI ZX-6R - 2012 LEGEND DELUXE V-NOSE - 2008 KAWASAKI ZZR600 - 2008 FORD FOCUS SE - 2007 KAWASAKI ZX-6R - 2002 ARTIC CAT 500 - 1990 JOHN DEERE 265 - 1966 FORD THUNDERBIRD HARDTOP TOWN

        Comment

        • YellowRose
          Super-Experienced


          • Jan 21 2008
          • 17229

          #19
          My '66 Hardtop Town Build

          Cody, have you taken a look at the Technical Resource Library (TRL)? There is information in it regarding repairing these motors, though it applies to Squarebirds, as I recall. But it should be a help to you regarding the motors in your Flairbird. Go to the TRL, hit the Ctrl and the F key, type in window motors and it should take you right to that section. The TRL link is always part of my and jopizz's signature element.

          Ray Clark - Squarebirds Administrator
          The Terminator..... VTCI #11178 ITC #6000 Yellow Mustang Registry (YMR) #12188
          Contact me via Private Message for my email address, or Call (Cell) 210-875-1411

          https://www.squarebirds.org/picture_gallery/TechnicalResourceLibrary/trl.htm
          Faye's Ovarian Cancer Memorial Website.
          https://faye.rayclark.info/index.html

          Comment

          • Cwcb08
            Experienced
            • Oct 11 2016
            • 163

            #20
            Originally posted by YellowRose
            Cody, have you taken a look at the Technical Resource Library (TRL)? There is information in it regarding repairing these motors, though it applies to Squarebirds, as I recall. But it should be a help to you regarding the motors in your Flairbird. Go to the TRL, hit the Ctrl and the F key, type in window motors and it should take you right to that section. The TRL link is always part of my and jopizz's signature element.
            The motors work, although one is a little weak, I'm on to diagnosing the switches, the vent switches and motors work perfectly
            2016 FORD F150 XLT 3.5 EB SPORT 302a - 2012 KAWASAKI ZX-6R - 2012 LEGEND DELUXE V-NOSE - 2008 KAWASAKI ZZR600 - 2008 FORD FOCUS SE - 2007 KAWASAKI ZX-6R - 2002 ARTIC CAT 500 - 1990 JOHN DEERE 265 - 1966 FORD THUNDERBIRD HARDTOP TOWN

            Comment

            • simplyconnected
              Administrator
              • May 26 2009
              • 8787

              #21
              Console switches are famous for collecting junk inside. Our members carefully disassemble the switches, clean them and put them back. It might also be wise to swap the driver's switch with one not so frequently used. - Dave
              Member, Sons of the American Revolution

              CLICK HERE to see my custom hydraulic roller 390 FE build.

              "We've got to pause and ask ourselves: How much clean air do we need?"
              --Lee Iacocca

              From: Royal Oak, Michigan

              Comment

              • Yadkin
                Banned
                • Aug 11 2012
                • 1905

                #22
                Originally posted by Cwcb08
                Anyone have any idea what this wire is, looks like a ground maybe?
                Started under the Centre console cubby and terminated in the pass footwell. I couldn't identify anywhere it might have gone or came from and it doesn't look factory.
                I'm guessing that's a ground that someone cobbed up to serve the FM converter. The console is screwed to the chassis so it's not a good direct chassis ground. Get rid of it.

                Love the horn button.

                Comment

                • Cwcb08
                  Experienced
                  • Oct 11 2016
                  • 163

                  #23
                  Originally posted by Yadkin
                  I'm guessing that's a ground that someone cobbed up to serve the FM converter. The console is screwed to the chassis so it's not a good direct chassis ground. Get rid of it.

                  Love the horn button.
                  i was thinking thats where it might have come from but i have removed 3 wires from that area to the fuse box already. i wired the fm converter to an unused switched 2 wire lead in the console with a factory style connector. this green wire went almost to the ashtray for the back seat and has a odd curved spade connector at one end


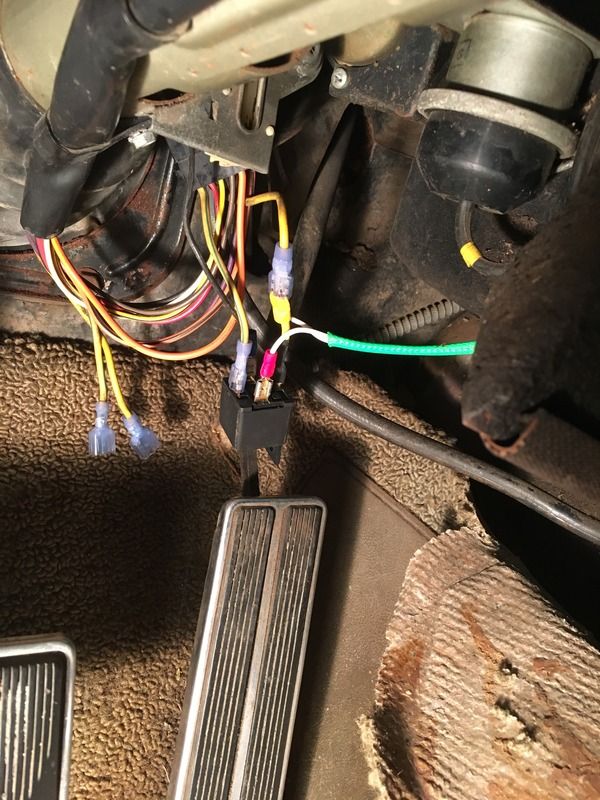
                  the horn button is funny really and my wife doesn't like it ha. here in ontario i need to have a labeled button within drivers reach to get it safetied, the factory buttons are shorted at the wheel ( and started smoking the first time i tried it lol). so i found where the horn power came in and out of the wheel cut them added a relay and tapped the hot for the low current side of the relay/'horn' button. i used insulated connectors under the dash so when we get a new steering wheel and horn buttons i can switch it back to factory easily. i also had to replace one of the snail horns as it squeaks then stops making noise, i used a fiamm freeway blaster i got at princess auto cheap
                  Last edited by Cwcb08; November 21, 2016, 12:02 PM.
                  2016 FORD F150 XLT 3.5 EB SPORT 302a - 2012 KAWASAKI ZX-6R - 2012 LEGEND DELUXE V-NOSE - 2008 KAWASAKI ZZR600 - 2008 FORD FOCUS SE - 2007 KAWASAKI ZX-6R - 2002 ARTIC CAT 500 - 1990 JOHN DEERE 265 - 1966 FORD THUNDERBIRD HARDTOP TOWN

                  Comment

                  • Yadkin
                    Banned
                    • Aug 11 2012
                    • 1905

                    #24
                    Originally posted by Cwcb08
                    i was thinking thats where it might have come from but i have removed 3 wires from that area to the fuse box already. i wired the fm converter to an unused switched 2 wire lead in the console with a factory style connector. this green wire went almost to the ashtray for the back seat and has a odd curved spade connector at one end


                    the horn button is funny really and my wife doesn't like it ha. here in ontario i need to have a labeled button within drivers reach to get it safetied, the factory buttons are shorted at the wheel ( and started smoking the first time i tried it lol). so i found where the horn power came in and out of the wheel cut them added a relay and tapped the hot for the low current side of the relay/'horn' button. i used insulated connectors under the dash so when we get a new steering wheel and horn buttons i can switch it back to factory easily. i also had to replace one of the snail horns as it squeaks then stops making noise, i used a fiamm freeway blaster i got at princess auto cheap
                    I recommend that you get an electrical diagram book for your car. Not that expensive and will save a lot of time. My car was built with few options so you may have more in the harness than I do. The only factory wires that I have through to the back seat are the courtesy lights, the trunk light, the fuel level sensor, and of course the exterior lighting.

                    The horn is switched on the ground side and has a factory relay mounted under the hood. Maybe some joker bypassed the relay and that would cause the horn switches or circular contact to smoke.

                    The two long buttons on the steering wheel each have switches wired through the center of the plastic wheel to a circular metal base plate. The plate makes contact with the turn signal harness assembly through a spring loaded copper "button". If you remove the wheel you see the plate and button and can test the switches with an ohm meter. I like to use a small amount of white grease on this circular contact area for smooth operation.

                    Comment

                    • Yadkin
                      Banned
                      • Aug 11 2012
                      • 1905

                      #25
                      Another big hazard that you should be aware of is the dash mounted ammeter. The '64 (and I assume earlier models) came with a shunt type ammeter that took most of the alternator load though heavy gauge wire mounted directly to ther rear of the instrument. It's rated at about 40 amps. Modern alternators put out at least 100 amps, so you can see where a problem can easily occur.

                      I initially solved this problem in my resto-mod by installing a modern power panel under the hood then back-feeding the factory panel with a 40 amp fuse. However I then proceeded to further protect from instrument panel fires by installing relays for the headlamps and all my added on accessories, only to find that the ammeter then had not enough amps to measure. Last week I solved the problem completely by removing or abandoning the big ammeter wires and converting to a volt meter.

                      Later models, yours included, may have a remote shunt under the hood somewhere. Either way it's something that you need to address if you have a high output alternator.

                      Comment

                      • YellowRose
                        Super-Experienced


                        • Jan 21 2008
                        • 17229

                        #26
                        My '66 Hardtop Town Build

                        Cody, if you have not looked at the Technical Resource Library (TRL), you should. Bring it up, and push the Ctrl button and the F (for Find) button, and type in Wiring Diagrams. It will take you right to every wiring diagram we have for these Tbirds of ours. There are 12 sets of wiring diagrams for the 1966 Tbird alone, plus a link to the webpage that covers the 1965-1968 Sequential Turn Signal system.

                        Ray Clark - Squarebirds Administrator
                        The Terminator..... VTCI #11178 ITC #6000 Yellow Mustang Registry (YMR) #12188
                        Contact me via Private Message for my email address, or Call (Cell) 210-875-1411

                        https://www.squarebirds.org/picture_gallery/TechnicalResourceLibrary/trl.htm
                        Faye's Ovarian Cancer Memorial Website.
                        https://faye.rayclark.info/index.html

                        Comment

                        • Cwcb08
                          Experienced
                          • Oct 11 2016
                          • 163

                          #27
                          Originally posted by Yadkin
                          I recommend that you get an electrical diagram book for your car. Not that expensive and will save a lot of time. My car was built with few options so you may have more in the harness than I do. The only factory wires that I have through to the back seat are the courtesy lights, the trunk light, the fuel level sensor, and of course the exterior lighting.

                          i have a shop manual

                          The horn is switched on the ground side and has a factory relay mounted under the hood. Maybe some joker bypassed the relay and that would cause the horn switches or circular contact to smoke.

                          The two long buttons on the steering wheel each have switches wired through the center of the plastic wheel to a circular metal base plate. The plate makes contact with the turn signal harness assembly through a spring loaded copper "button". If you remove the wheel you see the plate and button and can test the switches with an ohm meter. I like to use a small amount of white grease on this circular contact area for smooth operation.
                          one of the long buttons is missing a spring and that will be one of the components we replace when we do the steering wheel, part of the reason I made it easily reversible

                          Originally posted by Yadkin
                          Another big hazard that you should be aware of is the dash mounted ammeter. The '64 (and I assume earlier models) came with a shunt type ammeter that took most of the alternator load though heavy gauge wire mounted directly to ther rear of the instrument. It's rated at about 40 amps. Modern alternators put out at least 100 amps, so you can see where a problem can easily occur.

                          I initially solved this problem in my resto-mod by installing a modern power panel under the hood then back-feeding the factory panel with a 40 amp fuse. However I then proceeded to further protect from instrument panel fires by installing relays for the headlamps and all my added on accessories, only to find that the ammeter then had not enough amps to measure. Last week I solved the problem completely by removing or abandoning the big ammeter wires and converting to a volt meter.

                          Later models, yours included, may have a remote shunt under the hood somewhere. Either way it's something that you need to address if you have a high output alternator.
                          I saw your thread about making your ammeter a voltmeter it looks good 👍🏻

                          Pretty sure we have a stock alternator but if we upgrade I'll keep it in mind thanks


                          Here is the horn setup


                          And this is where I hooked up the fm transmitter


                          I dissambled the window switches cleaned and lightly sanded the contacts after a quick look at the technical links and they wor again! One more issue solved
                          2016 FORD F150 XLT 3.5 EB SPORT 302a - 2012 KAWASAKI ZX-6R - 2012 LEGEND DELUXE V-NOSE - 2008 KAWASAKI ZZR600 - 2008 FORD FOCUS SE - 2007 KAWASAKI ZX-6R - 2002 ARTIC CAT 500 - 1990 JOHN DEERE 265 - 1966 FORD THUNDERBIRD HARDTOP TOWN

                          Comment

                          • Yadkin
                            Banned
                            • Aug 11 2012
                            • 1905

                            #28
                            Originally posted by Cwcb08
                            I disassembled the window switches cleaned and lightly sanded the contacts after a quick look at the technical links and they work again! One more issue solved
                            Buy a can of electrical contact cleaner at your local hardware or big box home improvement store. It's in the electrical department.

                            The chrome in your last photo is plated, cast aluminum. Yours is in good shape. It will brighten up even more by washing with diet coke (contains phosphoric acid) and a blue scotch-brite pad. Then wash and rinse. Dents/ scratches you'll have to live with. Ditto with most of the interior chrome trim, either cast/ chrome plated or anodized aluminum.

                            An exception is the chrome that you took off to remove the side panels of the console - these are stainless steel. A far superior material, dents can be removed easily by someone well trained. That same person can sand out scratches, "sanding up" through progressive grits, then through at least two buffing wheel grits. It's not rocket science as I've done all the stainless on my own car to mirror finishes.

                            Most of the interior finish panels can be refurbished by cleaning and painting. The instruments are cast aluminum, textured and painted. The remainder of the dash structure is textured or flat steel painted. The side console panels and seat panels are vinyl coated steel. I've used a light coat of engine enamel on mine but that was before I discovered vinyl paint. I used a very light coat of vinyl paint on my kick panels and seat bottoms and those turned out very nice.

                            Comment

                            • Cwcb08
                              Experienced
                              • Oct 11 2016
                              • 163

                              #29
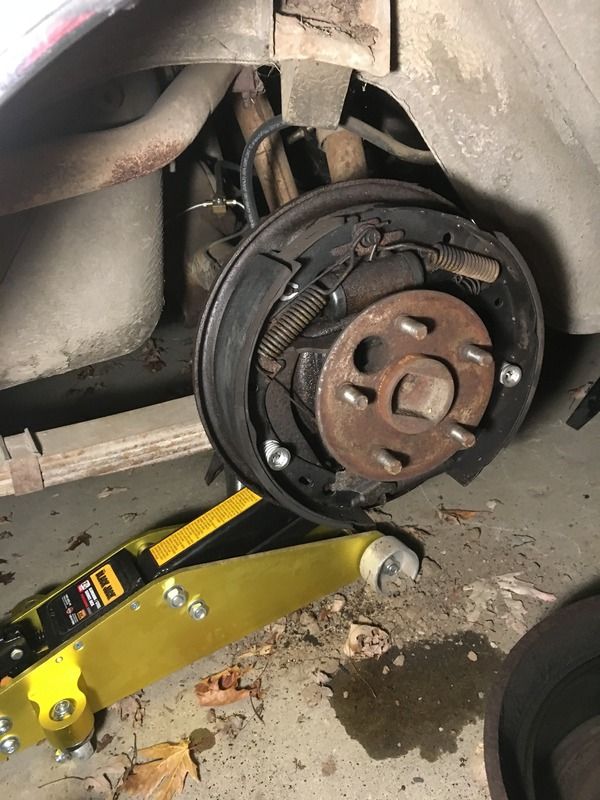
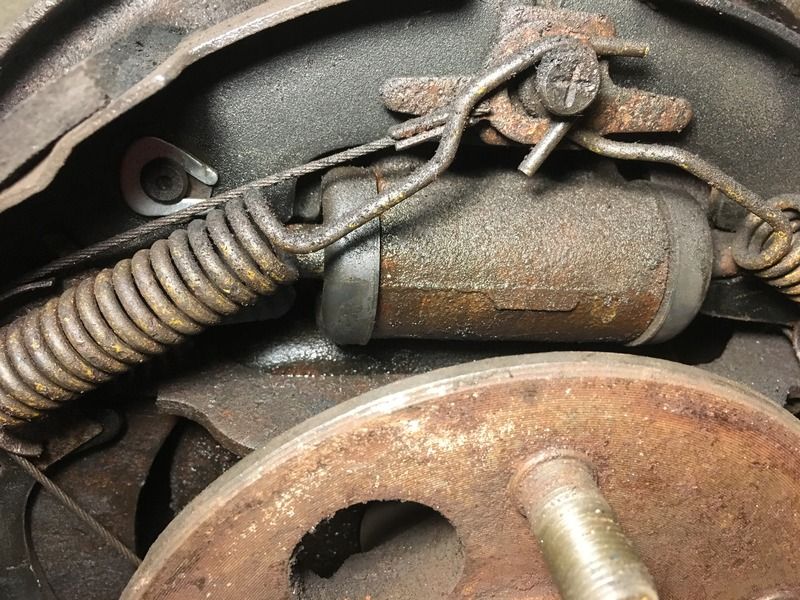
                              Was showing the car to a friend and he was looking underneath and saw this


                              Going to replace both wheel cylinders

                              While I'm ordering I'll get an ac compressor belt, does anyone know the specs of the belt I require? I didn't see any part numbers or specs in the shop manual
                              2016 FORD F150 XLT 3.5 EB SPORT 302a - 2012 KAWASAKI ZX-6R - 2012 LEGEND DELUXE V-NOSE - 2008 KAWASAKI ZZR600 - 2008 FORD FOCUS SE - 2007 KAWASAKI ZX-6R - 2002 ARTIC CAT 500 - 1990 JOHN DEERE 265 - 1966 FORD THUNDERBIRD HARDTOP TOWN

                              Comment

                              • simplyconnected
                                Administrator
                                • May 26 2009
                                • 8787

                                #30
                                This leaky rear brake kinda proves that the rear wheels don't do much stopping. This side is soaked in brake fluid. That means the other side would have pulled more and this side's shoes are well lubricated. Cody probably wouldn't notice it even farther down the road unless he was looking for a reason why the brake fluid level was going down.

                                Don't feel bad Cody, I had a Pontiac Tempest with a rear cylinder that had a hydraulic port that was never drilled. I only noticed because the shoe never wore down.

                                Your shoe looks like it's nearly new. Just because it's soaked doesn't mean you need to throw it out. Brake linings are made to take tremendous heat under normal stopping operation.

                                When you have the shoes off, put them in a vice (just to hold them) and go over the linings with a propane torch. As they heat, you will see the brake fluid oozing out. Wipe it off with a paper towel and keep going until it stops oozing. Your lining will turn gray in color and it will look dry, because it will be. Don't worry about fire because brake fluid is glycol-based, not petroleum. In fact, I keep ALL petroleum products far away from my brake system including brake cleaner. Brake cleaner is highly flammable and it swells rubber brake parts.

                                I normally use the rebuild kits for my cylinders. They are inexpensive and I have control over the bore condition. Older cylinders usually get a rubber ring embedded in the walls from the cups inside because that's the only part that touches the casting. I use old brake cleaner and (wet-or-dry) sand paper to smooth the castings inside. A brake hone is not necessary. NEVER use petroleum products or water near DOT-3.

                                If you have an abundance of money or no time, you can always buy everything new but the result is about the same. - Dave
                                Member, Sons of the American Revolution

                                CLICK HERE to see my custom hydraulic roller 390 FE build.

                                "We've got to pause and ask ourselves: How much clean air do we need?"
                                --Lee Iacocca

                                From: Royal Oak, Michigan

                                Comment

                                Working...
                                😀
                                🥰
                                🤢
                                😎
                                😡
                                👍
                                👎